Pear Frangipane Tart
This classic French poached pear tart is made with a sweet tart dough and filled with poached pears and frangipane (almond cream). Serve over the holiday season for a special treat!
. This tart is delicious and is wonderful served on Thanksgiving or over the holiday season! Top with powdered sugar or apricot glaze. #tart #recipe #abeautifulplate #pear #frangipane #poached #French #dessert #pastry")
I’m so excited to partner with Harry & David once again to bring you one of my favorite classic dessert recipes!
This classic pear frangipane tart uses my all-time favorite Harry & David product: their famous Southern Oregon grown Royal Riviera pears.
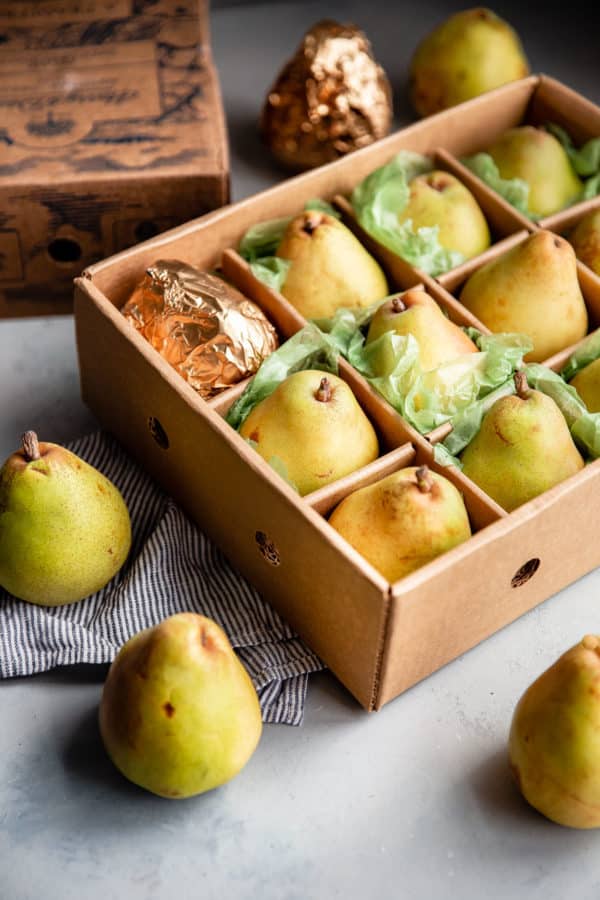
My family has been ordering Royal Riviera pears over the holiday season for as long as I can remember. It has become a long-standing tradition and one we look forward to each year.
They make for a wonderful holiday gift to send to friends and family too. I’m all about edible gifts at this time of year.
Ingredient Breakdown: Royal Riviera Pears
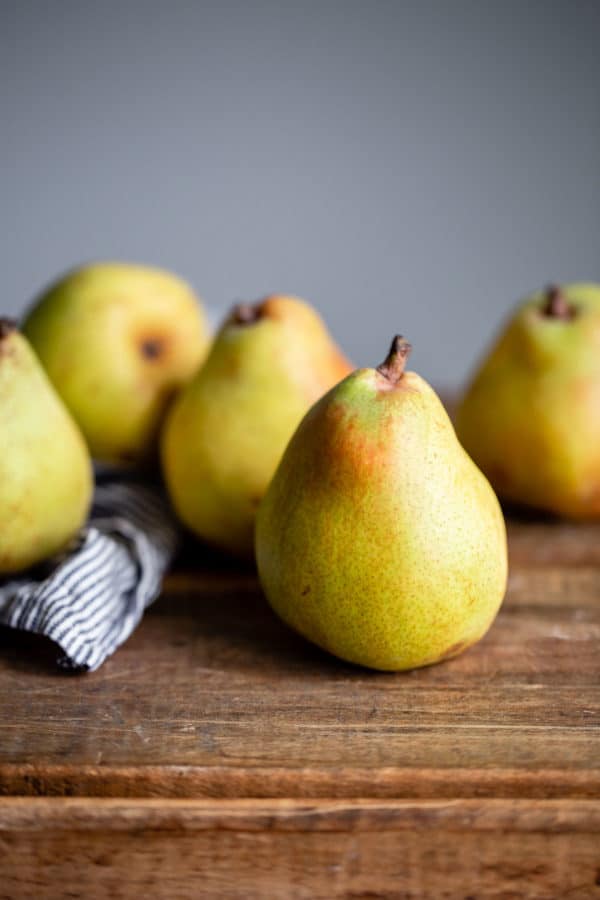
Hand picked at peak maturity, Royal Riviera pears are buttery, sweet, and incredibly juicy. Like, so juicy that you’ll have to stand over a sink while you eat them. They’re incredible, always arrive in perfect condition, and never ever disappoint.
So you can imagine my excitement when two boxes of my favorite pears arrived on my doorstep, and I was asked to create a fun new pear recipe for you.
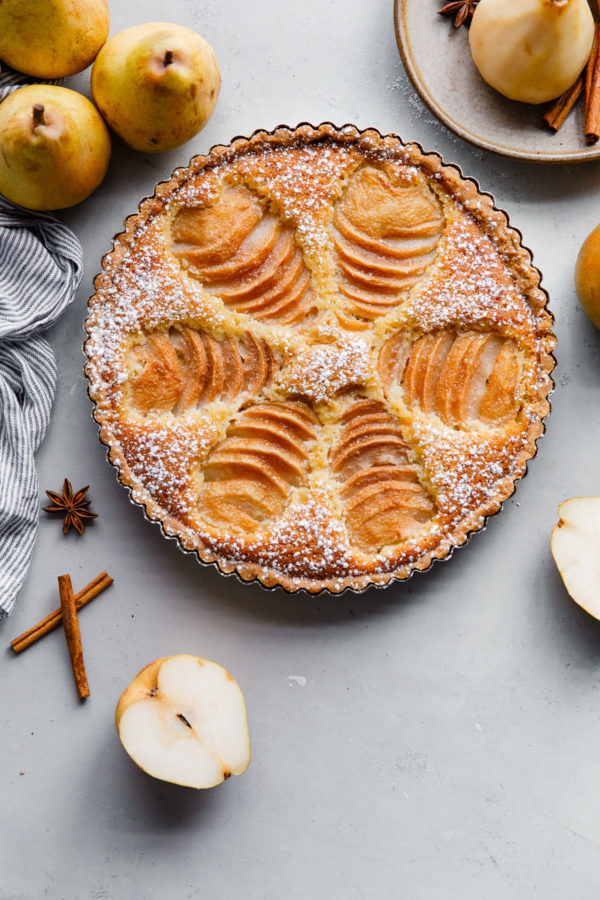
I brainstormed a few ideas, but kept coming back to one of my favorite desserts of all-time: pear frangipane tart. Otherwise known as la tarte bourdaloue.
A classic French tart made with pate brisee (sweet tart dough), poached pears, and frangipane (almond cream).
. This tart is delicious and is wonderful served on Thanksgiving or over the holiday season! Top with powdered sugar or apricot glaze. #tart #recipe #abeautifulplate #pear #frangipane #poached #French #dessert #pastry")

How to Poach Pears
In keeping with tradition, this pear tart uses poached pears for the filling. While it’s tempting to just enjoy them on their own, Royal Riviera pears are fabulous for baking, as they have a very buttery texture and maintain their shape extremely well.
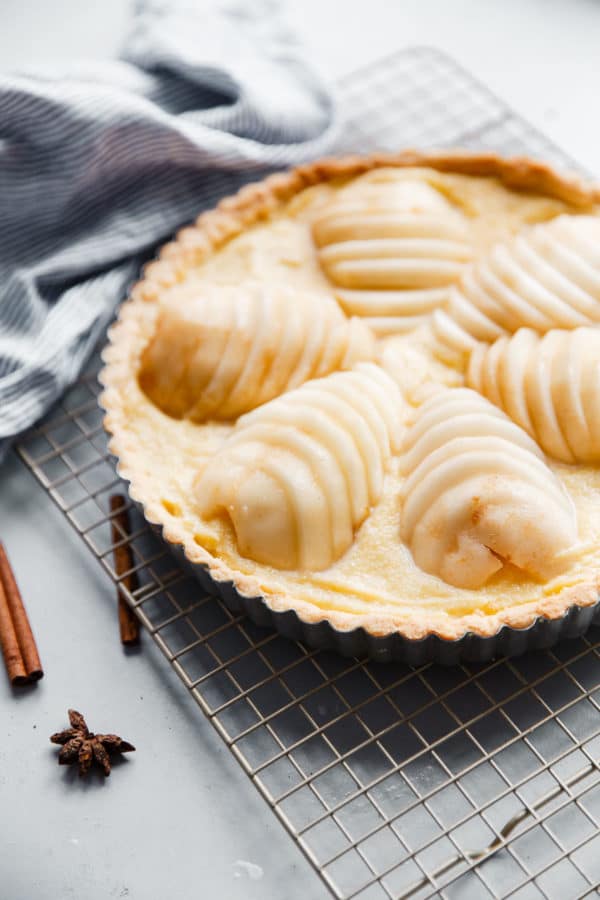
For this tart recipe, we’ll be poaching whole cored pears in a simple syrup infused with cinnamon sticks, star anise pods, and vanilla bean.
One important thing to keep in mind when poaching is to always use firm, just barely ripe pears. You do not want to allow the pears to fully ripen or they will break down during the poaching process.
. This tart is delicious and is wonderful served on Thanksgiving or over the holiday season! Top with powdered sugar or apricot glaze. #tart #recipe #abeautifulplate #pear #frangipane #poached #French #dessert #pastry")
What is Frangipane?
Pronounced fran-juh-pan, frangipane is a dessert filling made from ground almonds, butter, eggs, sugar, and small amount of unbleached all-purpose flour. It is sometimes referred to as almond cream.
I fully came to appreciate frangipane in culinary school. We used it constantly for various applications and its ability to transform desserts never ceased to amaze me. It rises as it bakes, and has a wonderful texture and almond flavor that beautifully compliments pears.
Frangipane is made from finely ground almonds, aka. almond flour. While you can flavor frangipane any number of ways, the frangipane filling for this tart is kept fairly traditional.
I like to add fresh lemon zest, a touch of dark rum (optional), and pure vanilla extract.
Blind-Baking the Tart Crust
As is the case with many tart recipes, this pear frangipane tart requires you to blind-bake the tart dough prior to adding the filling.
Blind baking adds another step to this recipe, but is very important for the final result.
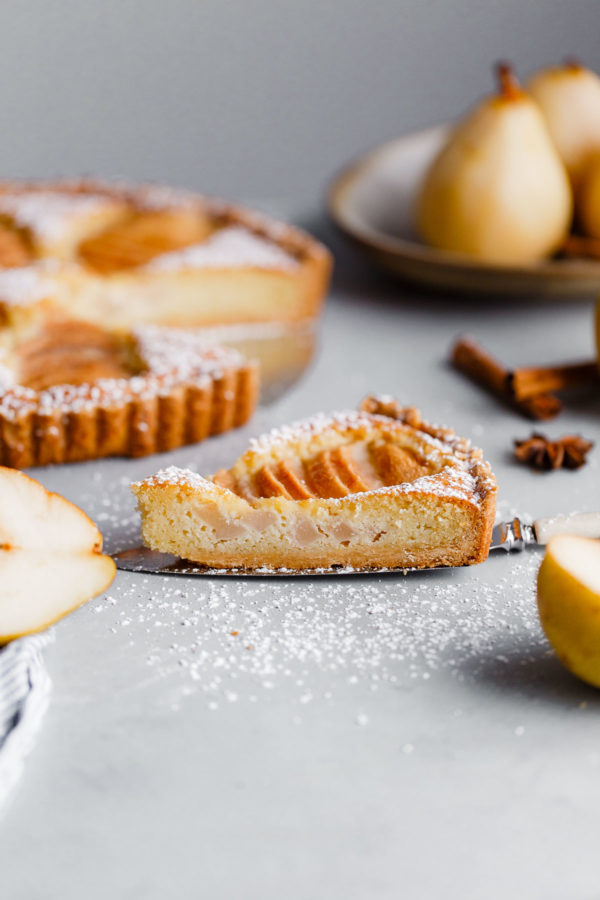
It ensures that the tart dough is cooked through completely, gains a deep golden color (aka. flavor!), and ensures a crisp, buttery texture that balances the softer pear frangipane filling.
How to Make It Ahead:
While this dessert does involve several components and steps, there are ways to prep it in advance and make the process more time-friendly.
- Sweet Tart Dough – prepare and refrigerate the tart dough several days in advance (or freeze up to a month ahead and allow to thaw in the refrigerator before rolling out)
- Poached Pears – pears can be poached several days in advance and kept in an airtight container in the fridge.
- Frangipane Filling – frangipane comes together quickly and stores extremely well. Make it several days in advance and store it in the refrigerator until you’re ready to use it. It also freezes well, just be sure to transfer it to the refrigerator in advance and allow it to thaw completely before using.
. This tart is delicious and is wonderful served on Thanksgiving or over the holiday season! Top with powdered sugar or apricot glaze. #tart #recipe #abeautifulplate #pear #frangipane #poached #French #dessert #pastry")
How to Serve Pear Frangipane Tart:
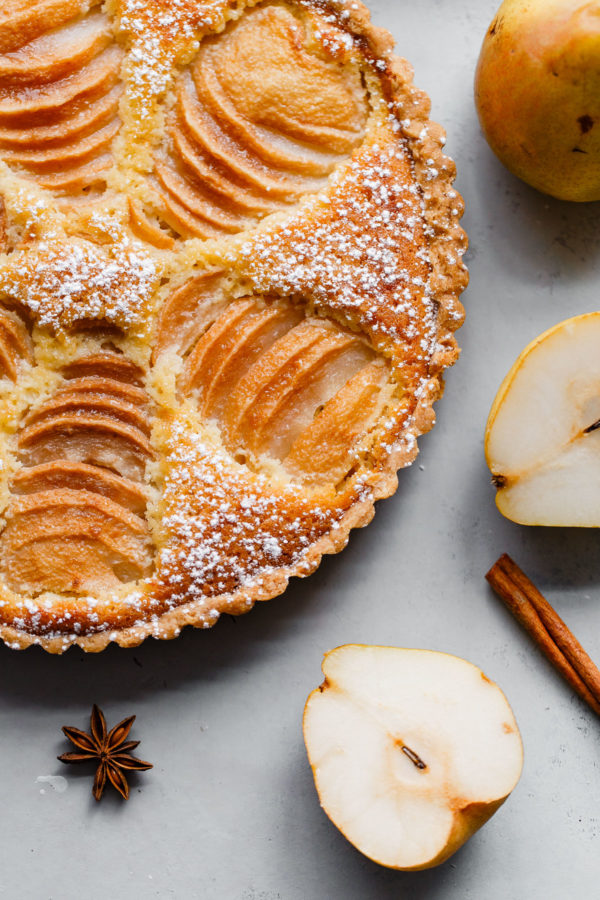
Once baked, you’ll want to allow the tart to cool almost completely before serving. I like to garnish it with a simple dusting of sugar. You can also brush the top with a simple apricot glaze for shine if you desire.
The tart is best served on it’s own or with a simple dollop of whipped cream. This would make an excellent dessert for Thanksgiving or enjoyed over the rest of the holiday season.
. This tart is delicious and is wonderful served on Thanksgiving or over the holiday season! Top with powdered sugar or apricot glaze. #tart #recipe #abeautifulplate #pear #frangipane #poached #French #dessert #pastry")
Pear Frangipane Tart
Ingredients
Tart Dough:
- 2 cups (240 g) unbleached all-purpose flour fluffed, spooned, and leveled
- ⅓ cup (70 g) granulated sugar
- ¼ teaspoon kosher salt
- 1 teaspoon lemon zest
- 11 tablespoons (155 g; 1 stick plus 3 tablespoons) cold unsalted butter cubed
- 1 large egg yolk
- 1 teaspoon pure vanilla extract
Poached Pears:
- 6 cups (1.4 L) cold water
- 2 cups (400 g) granulated sugar
- 2 cinnamon sticks
- 1 star anise pod
- 1 tablespoon vanilla bean paste or 1 tablespoon vanilla extract or 1 vanilla bean, scraped
- 2 strips lemon peel without the pith, plus half a lemon
- 3 Harry & David Royal Riviera Pears firm yet slightly ripe
Frangipane Filling:
- 8 tablespoons (4 oz; 115 grams) unsalted butter softened
- ½ cup + 1 tablespoon (115 g) granulated sugar
- 1 cup (115 g) almond flour
- 3 large whole eggs room temperature
- 1 tablespoon (15 g) unbleached all-purpose flour
- 1 teaspoon pure vanilla extract
- ½ teaspoon lemon zest
- 1 tablespoon dark rum optional
For Serving
- powdered sugar for dusting (optional)
- lightly sweetened whipped cream optional
Instructions
- Prepare the Tart Dough: Lightly grease a 10-inch tart pan with a removable bottom and set aside. In the bowl of a food processor, combine the flour, sugar, salt, and lemon zest. Pulse until well mixed. Add the cold cubed butter and pulse repeatedly until the butter is well distributed into the flour. You shouldn't be able to see any distinguishable pieces. Add the egg yolk and vanilla extract and pulse continuously until the dough just starts to clump together. Note: It might appear very dry at first, but if you continue to pulse and process, it will come together. Be patient.
- Transfer the dough and any smaller pieces to a clean countertop, and knead - pressing the dough down with the heel of your hand - until it is completely smooth. It will resemble a sugar cookie dough in texture. Press the dough into the greased tart pan (with a removable bottom) - it should be just under ¼-inch thick, you should have some dough leftover - and chill in the fridge for a minimum of one hour, or freeze for at least 30 minutes. If you are preparing the dough ahead of time: press it into a disc, wrap tightly in plastic wrap, and refrigerate for a minimum of 1 hour or up to 2 days. If following this method, take the dough out of the fridge at least 15 to 20 minutes before rolling, as it will be too hard to roll right from the fridge. Roll the dough out (between pieces of parchment or wax paper to prevent sticking), carefully pick up and transfer the dough to the tart pan, using fingers to push in dough and gently shape the tart. If it cracks, just simply patch or press the pieces back together. This is a forgiving tart dough. Make sure to press dough tightly inside corners and sides. The dough can be made up to 2 days in advance or frozen up to a month ahead.
- Poach the Pears: As the tart dough is chilling, poach the pears. Combine the cold water and granulated sugar in a medium pot (roughly 3-quart capacity). Place over medium heat and bring to a simmer, stirring occasionally, until the sugar has completely dissolved. Add the cinnamon sticks, star anise pod, vanilla bean paste, and lemon peel.
- Peel the pears, leaving the stem on, and gently rub each pear with the lemon half to prevent the pears from oxidizing. Using melon baller or small paring knife, core the pears from the bottom end. Using a large spoon, gently lower the cored, whole pears into the poaching liquid. The poaching liquid should almost completely cover the pears.
- Return the poaching liquid to a low simmer, cover the surface of the pot with a parchment round, and simmer the pears, occasionally flipping them during the cooking process, for about 12 to 15 minutes or until tender. Remember that you will be cooling the pears in the liquid, so do not overcook. You can test whether the pears are done by piercing the pear (through the bottom end) with a paring knife. The pears should be tender, yet not at all mushy.
- Cool the pears to room temperature in the poaching liquid. Serve or transfer the pears to a large container and refrigerate for up to one week. The poaching liquid can be kept, discarded, or used to store the poached pears. Try reusing the liquid for poaching other pears or as a simple syrup in cocktails, etc.
- Blind Bake the Tart Shell: Meanwhile, preheat the oven to 375°F (190°C) with a rack in the center position. Lightly grease the shiny side of a piece of aluminum foil and fit it, buttered side down, against the chilled tart dough. Fill the foil with baking weights, dried beans, or granulated sugar (all options work well). Place the tart pan on a baking sheet and bake for 20 minutes. Remove the foil and weights, and bake uncovered for an additional 10 to 15 minutes, or until the shell is lightly golden and cooked through. Set tart pan on a wire rack to cool completely before adding the frangipane and poached pears.
- Make the Frangipane Filling: Combine the butter and sugar in the bowl of a stand mixer fitted with a paddle attachment (or use a hand-held mixer). Beat over medium speed until creamy. Over low speed, add the almond flour, alternating with egg until the ingredients are incorporated evenly. Add the flour and mix to combine. Add the vanilla extract, lemon zest, and rum (if using) and mix until just combined. Use right away if the other tart components are ready, or transfer to a container and refrigerate until ready to use.
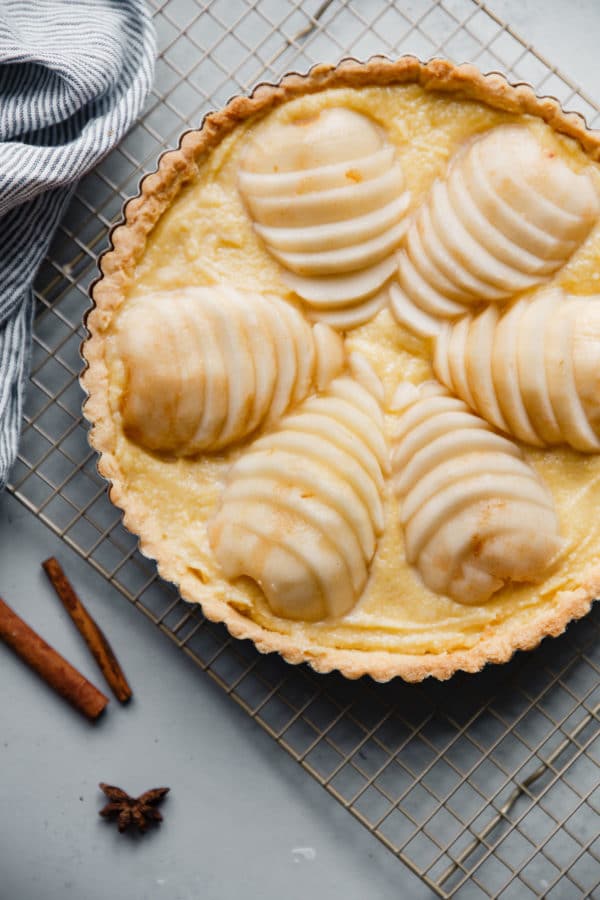
- Assemble the Tart: Place the tart pan on a baking sheet. Fill the pre-baked tart shell with the frangipane filling and spread into an even layer with an offset spatula. Place the poached pears on a few paper towels to help soak up any excess poaching liquid (this will help prevent it from seeping into the frangipane). Cut the poached pears in half, removing the stem and any core that might remain. Slice the pear halves crosswise into thin slices. Using a spatula, carefully lift each sliced pear half and place on the frangipane, with the narrow end of the pear facing the center of the tart, fanning the slices apart slightly as you work. Repeat with the remaining pear halves, spacing them evenly around the tart.
- Bake at 375°F (190°C) for 40 to 55 minutes, or until the frangipane has risen substantially around the pears and is deep golden brown in color. Note: *If your oven runs hot, you may wish to reduce the temperature by 25 degrees. If the edges of the tart are gaining color too quickly, you can lightly cover them with a ring of foil - be sure to cook the filling through completely. Transfer the tart to a rack to cool until lukewarm or room temperature before removing the sides of the tart pan.
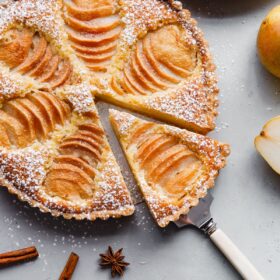
- Before serving, dust lightly with powdered sugar. Serve plain or with whipped cream. While you can prepare several components of this tart ahead, it is best served the day of baking. Any leftovers can be kept at room temperature for 1 to 2 days.
Tips for Success
- It is very important to use firm, just barely ripe pears, whenever you are poaching. Otherwise they will become mushy and overcooked.
- You can use uncooked pears for this recipe as well, however they won't have quite as much flavor as the poached pears. If following this method, use slightly riper pears (but make sure they are still fairly firm).
- For added flavor: Infuse the frangipane with 1/2 teaspoon ground cinnamon and 1/4 teaspoon ground cardamom.
168 Comments on “Pear Frangipane Tart”
I was wanting to make this for Christmas with some pears I bought from the local FFA at school. My 4 month old ended up in the hospital and Christmas is being postponed for 2 weeks. We’re home now and I was wondering if I could make it now, as my pears are perfect for poaching, and then freeze the whole tart for two weeks?
Hi Nickie! So sorry to hear this news and hope your child is OK/recovering! I’ve never tried freezing the whole tart. You could certainly try, but I’m worried it would impact the texture, particularly of the pears, or result in it being a bit soggy when after defrosting. Sorry I can’t be more helpful!
All I have is a 9 inch tart pan. Do you think that will be alright?
Yes! That should be fine. You just will have a little bit extra dough and filling, so be mindful of that. I would also watch the baking times a bit more closely too. Hope you enjoy and would love for you to come back a leave a review/feedback once you make it!! Thanks in advance!
Something is off on the temperatures or the times in this recipe. My crust and tart almost burned! I ended up taking the tart out after 25 minutes and was so thankful I checked on it or my Thanksgiving dessert would have been ruined. I followed all the directions to a T and double checked myself afterward. I don’t know which is off, but I recommend rechecking this recipe.
Hi Jane. Thank you for your comment and I’m really sorry to hear that. This is the first time that I’ve ever received a review on this recipe that states that the tart nearly burned – it simply does not make sense that that would happen in that short of a period. Frangipane fillings need time to cook through, and 25 minutes is not sufficient – if you glance at any basic pear tart recipe, my instructions and temperatures are the standard. This recipe was tested multiple times and has received a LOT of positive reviews. With all respect, it sounds like your oven runs hot. I would always suggest having a separate oven thermometer, as it is VERY common that oven calibrations are off by as much as 25+ degrees. Again, I apologize for any issues that you experienced and I’d be happy to retest it if I receive similar feedback again, but think there might be an issue on your end that hasn’t been accounted for!
I had trouble with the bake. The top of the dough browned very quickly so I figured it must be done, went against my better judgment and took it out of the oven, even though it seemed jigglie, when we cut into it after it cooled for several hours, it was very undercooked. Maybe I need to check the temp of my oven? Going to try it again tomorrow. To be honest, I could just eat the pears by themselves, they are so yummy after being poached!
Hi Kate, it sounds like your oven might run a bit hot. I always have a separate oven thermometer in my oven, which is very helpful to have and I highly recommend it. If the crust is browning too quickly – and the frangipane has not set (you definitely don’t want to undercook the filling – I would suggest creating a ring of foil to lightly cover the edges of the crust while it finishes baking, as people do with pie crusts, etc.
I will add that note to the recipe. Alternatively, there is a chance that the crust also gained too much color during the blind-baking, which would also make it brown even more quickly during the final bake. Hope this helps!
I do not have a food processor.
How else can I prepare the dough?
In Best of Health,
Beth
This dough is a bit tricky to make without a food processor. You can do it by hand, this (extremely old) video shows the process: https://www.youtube.com/watch?v=NqWvxLkzMiw
I used my kitchen aid and it did fine.
I had similar issues with dough not pulling together and actually threw out one batch and started out again and measuring by weight. We found you had to be patient with the food processor and keep going, we actually took some out and processed and that seemed to help and started to ball up. Once done pressed into a pan it was fine. Very yummy, I may add a bit more lemon zest to both filling and crust.
Thanks for your feedback Lili! Yes, some people have had similar issues, but I re-tested this dough just the other day with the exact weight measurements and had no issues. I do have a feeling that people are not being patient and processing enough – so I have added additional notes and clarification into the instructions to make it clearer. Glad that it worked for you and you tried it again! Appreciate you taking the time to leave your review! 🙂
Hi, is there a reason the pears are cored before poaching or could they be poached whole and cored just before they go on the tart? Thanks!
Hi Martha, it’s more traditional to core pears before poaching as it will reduce the cook time (and it makes it a bit easier to gauge that they’re cooked through but not overcooked) – but I don’t really see why you can’t poach them whole either. Hope this helps!
Thank you that’s helpful. I am going to make this tart for a gathering of friends on Thursday, I’ll let you know how it goes!
I just made this tart last night and had a piece for breakfast!!! it was absolutely delicious. However, I do have a question. The frangipane would not firm up for a long time, so I ended up baking the tart for almost an hour and a half so that the frangipane wouldn’t be too runny. By then the crust on the edge has slightly burnt, just a tiny bit. Do you think it is because of my oven temperature? Or maybe it is because I covered the whole frangipane with pears, so it is harder to get the frangipane? Would you suggest I increase it next time?
Hi Marvis! Do you mean that the frangipane took a long time to turn golden and puff up in the oven? It does sound like perhaps you added too much pear, as the entire surface of the tart is definitely not supposed to be covered, and I think perhaps the moisture from the pear (and just having no surface area exposed) would cause some issues. I wouldn’t increase the frangipane, but I would cover the tart in a similar way as shown in my recipe images.
However, it is also VERY common for ovens to run hot (or cold), so having a separate oven thermometer will always ensure more consistent results, especially if your crust was burning. Hope this helps!
I see! I definitely won’t cover the whole tart with pear next time. Even though the frangipane in my pie did not firm up, It is still super yummy!!! Can’t wait to give it another try. Nice work!
Amazing tart. Have now made twice. Had to adjust oven temp as mine runs a bit hot, but it is absolutely delicious and will impress all your guests!
So happy to hear that!! Thank you for taking the time to leave a review – it is very much appreciated by me (and other readers).
How did you get the dough to hold together without any liquid?? I had to add a few tablespoons of water??
Hi Cynthia! The egg yolk provides some liquid – that and the butter should be what brings the dough together. Please note that this is similar to a cookie dough (pate sucree) than a pie dough. They are very different, and it shouldn’t require any water! I wonder if the flour was potentially over measured, which could also explain why it was drier. I always recommend using a scale if possible or fluffing, spooning, and leveling the flour to get as close to scaling as possible. Hope this helps!
Made gluten free with King Arthur 1:1 gluten free flour for crust. Needed to use approx 5 tsp water to hold crust together but it came out perfect. Don’t care for anise so I left that out and used vanilla extract and cinnamon powder in place of vanilla paste and cinnamon sticks but otherwise followed recipe exactly. Overall it came out great and looked beautiful.
I’ve never used that flour substitute, but glad to know that you could adapt it slightly to make it work for you! Thanks for the feedback Laura! 🙂
I didn’t have almond flour, so I just food processed almonds to tiny bits. I used wild Baltimore City pears. The tart was delicious!!
So glad to hear that!
Hi does the pie crust looks very crumbly that it breaks when you hold it?
Hi Sachi! No, it shouldn’t be like this. It isn’t a pie crust, it is a pate sucree crust and should resemble more of a sugar cookie dough than a laminated dough. Did you use the proportions listed in the recipe? I haven’t heard this feedback before.
Mine was the same as Sachi’s after following the recipe. Very crumbly and couldn’t be rolled. But I was able to press it into the tart pan and it still came out nearly perfect after being baked.
Hmm…did you scale the ingredients? It should be similar to a sugar cookie dough in texture, and very smooth. My only thought is that you might be measuring your flour differently (and as a result, resulting in a drier texture). I scale my ingredients – but if you are using measuring cups, be sure to fluff the flour and spoon it gently into a measuring cup, then level.
I’ve had people make this tart before with great success, but it appears that some people are having trouble, so I may test it again and add further instruction. Glad it worked out well when you pressed it into the pan though, that would definitely work with this type of pastry dough!
Another quick note – unless you are preparing the tart dough in advance, it is intended to be pressed into the tart pan. It won’t be able to be rolled unless it is refrigerated, in which case it should be able to be rolled out. It is a delicate dough, so it may crack or split a bit, but it can be pressed together in the tart pan without any issue.
I was having this problem and I found that using three egg yolks instead of just one worked perfectly. Not sure if it’s a typo in this recipe, but I looked up other recipes for pâte sucrée and they all seem to use a larger proportion of egg yolk.
Hi! Not a typo – but I wonder if people are not using a scale (I always use a bakers scale) or dealing with drier climates, a bit more moisture could be necessary.
It does take patience to come together in the food processor – it will be crumbly and appear dry at first, but will eventually become smooth and come together well. I’ve tested it a few additional times since a few people have mentioned dealing with a more crumbly dough.
However, I may retest this with an additional yolk now that I live in a drier climate and see if it comes out better or could be a note that I could add to the recipe. Appreciate your feedback!
This sounds so delicious! Can I replace the all-purpose flour in the filling with almond flour to make it gluten free? Or should I better replace it with cornstarch? I’m using a different gluten free tart crust, just wondering about the purpose of the flour in the filling? Thank you ????
The all purpose just thickens it a bit, and provides some gluten for structure. It’s a pretty traditional addition to frangipane, but I have a feeling you could leave it out without any issues (or substitute it with a GF 1:1 flour blend if you have it, or just additional almond flour). Please let me know how it turns out!!
C
It appears you’ve forgotten the liquid in the tart dough…
Dianne – there is no liquid in the pie dough (aside from the egg yolk). Traditional sweet tart dough does not contain any standard liquid like water, I think you might be expecting this to be similar to a pie dough in that way? But it is not.
This was perfect! I had some pears left over and some almond flour, and this recipe was just what I needed 🙂 love it. I did have to adjust the baking time, but maybe my new oven doesn’t display the right temperature.
Can you make the tart with almond flour instead of all purpose?
I imagine you could, if you’re trying to make it gluten free. I might recommend your favorite other gluten free flour alt like coconut, to give it a different flavor as it’s quite strong in the frangipane and I think having the tart crust a different texture/flavor break from the almond is nice.
Oh no, I just spent two days making this so carefully and popped it in the oven and as I closed the door I went “oh no, the flour!” What a tragedy. I guess I will be serving pear quiche at tea today.
Oh no!!!! It was forgotten in the frangipane? If so, I think it might still be ok – or was it forgotten in the dough (can’t imagine that being possible).
I just made this for Christmas dessert and it was amazing! Tasted like it came from a fancy French bakery, the whole family was very impressed. Dad said it was the best Christmas dessert he’s had in years! This one’s a keeper for sure.
So delicious! We don’t know if the whipped cream is (optional) in our opinion though :-)!!
Hi Laura! Your Pear Frangipane Tart looks amazing!!! Perfect holiday dessert recipe! I love your photos too – they are so clear and crisp! 🙂
Pingback: On the List
Wow this is really beautiful ! We’ve given our parents the Harry and David Fruit of the Month club and sometimes can’t resist buying these pears for ourselves. This recipe is a great idea to try with them!
Hi. Just wondering if I can arrange the pear slices so they cover the filling in a fan-like pattern. Will that cause issues for the filling in terms of cooking?
You could definitely fan them out a bit more and it shouldn’t be an issue but I do like having at least some of frangipane exposed because it will brown more evenly and allow it to set better and contribute additional texture to the tart. Hope this helps!!
Thanks for getting back to me! I made this yesterday and ended up arranging the pears in a way that still allowed the frangipane to rise. It was delicious.
I’m a baking noob and this was my first tart ever and also first time making crust from scratch. My base actually cracked but I googled how to fix it and it came out perfectly fine. Also, not sure why one side of the crust kinda collapsed but it didn’t cause any major issues.
Everyone loved the tart and so did I. Thank you for the recipe.