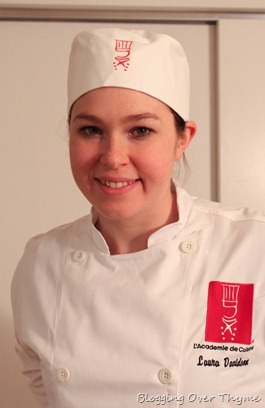
Day 3: Le Potage Cultivateur
I can’t believe our first week of culinary school is over. It flew by and I’m still kind of in shock that this is even happening! The main agenda for Friday’s class was POTAGE CULTIVATEUR. If you are wondering why I write all the menu items in caps, it is because it eliminates the issue of dealing with French accents! How convenient.
A potage cultivateur, as we learned in lecture at the beginning of the day, is essentially a ‘Farmer’s Soup’—or a hodge podge of whatever vegetables are currently in season. There is a distinct difference between a potage and soup, which is the term most of us are familiar with on an everyday basis. A potage is almost always started with leeks and has more of a pedigree attached to it.
A soup, on the other hand, is usually more loosely defined and is generally started with onions or whatever else is on hand. A bit less fancy, basically.
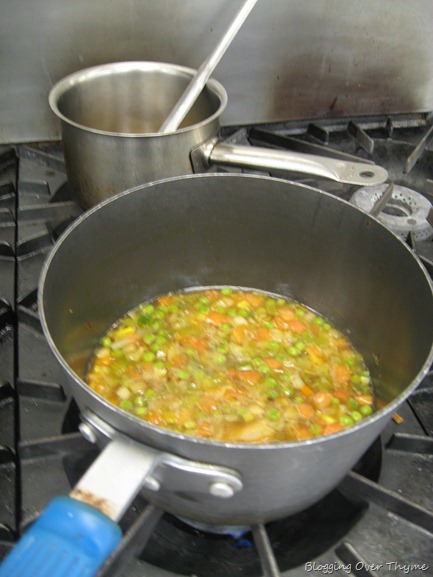
Our potage ingredients for the day involved relatively equal proportions of leeks, turnip, cabbage, carrots, potato, peas, celery, tomato, yellow squash, and zucchini. Oh yeah, and a bit of bacon, which we added for flavor. One major lesson in culinary school so far is, when in doubt, add bacon or cook with rendered bacon fat. I don’t necessarily agree, but I’m going with the flow!
One of the main reasons why we made a potage was to work on our knife skills, which continue to be a work in progress. Essentially for any soup, you want to strive to make all the ingredients uniform in size. The main reason for this is so that every ingredient cooks evenly. The other reason is for appearance. As our chef mentioned, you do not want to lift your spoon and only get one honking piece of one thing or other. Makes sense, right?
For this soup, we were required to chop every ingredient into a small dice—which is precisely a 1/2 inch by 1/2 inch cube. Since our soup included frozen peas, the small dice is approximately consistent with the size of a pea, which was important to consider. The first step, when making the soup, was to sweat the leeks, which means driving out the moisture (but not allowing to gain color). After this, you add stock and proceed to add each vegetable according to their cooking times (longest cooking vegetable went in first, and so forth).
One of the biggest lessons of culinary school yet, driven into us almost every day, is the importance of getting your MISE EN PLACE ready before you start cooking anything. In French, this literally means putting everything in place. In this case, it meant chopping up each vegetable and having every ingredient ready to go in little containers (we use deli cups at school, which are reused), so that when the cooking starts happening, you are in control and not running around, scrambling for one last minute item or another. This is actually a step that I really enjoy! I urge all of you to try to do this at home, at least once, as it makes cooking much more stress-free and relaxing.
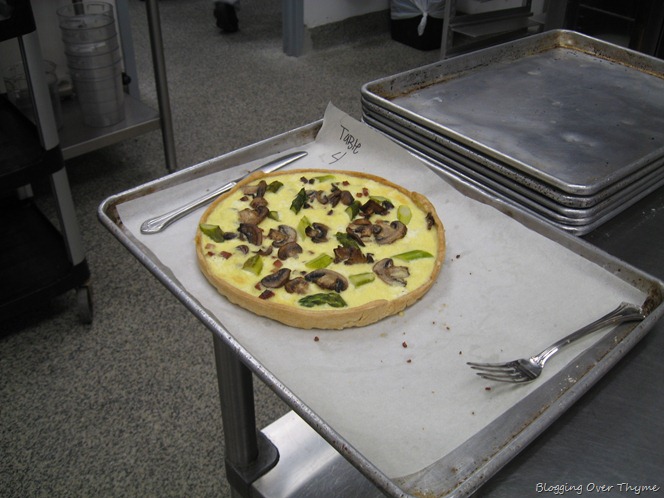
In addition to the potage, we also were required to make another quiche! QUICHE DU JOUR—basically a quiche of the day, with whatever ingredients we had on hand. Since we all had leftover pate brisee dough, the chefs wanted us to, once again, practice rolling out the dough, molding, blind baking and docking (piercing with a fork to prevent the bottom from expanding and rising). To add some variety and change it up, this time we made roughly an 8-inch quiche, and filled it with goat cheese, asparagus, mushrooms, and…wait for it…bacon!
Since we wanted all the components to be cooked, we cooked both the asparagus and mushrooms. The mushrooms were sliced evenly and quickly sauteed (saute means to literally ‘jump in the pan’ and involves cooking over high heat, with little fat) in clarified butter to drive out as much moisture as possible—since we did not want that to get added into the quiche.
We cooked the asparagus by peeling the lower two inches of the stalk and dropping them in boiling water (with lots of salt added) until cooked. We also learned in lecture that cooking the asparagus in highly salted boiling water helps to keep the asparagus bright green and enhances their texture and flavor. After cooking them, we placed them in an ice bath to halt the cooking and then blotted them dry, before chopping to add to the tart.
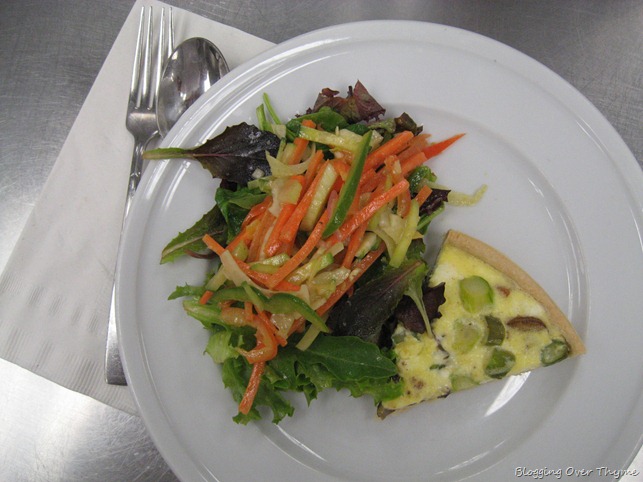
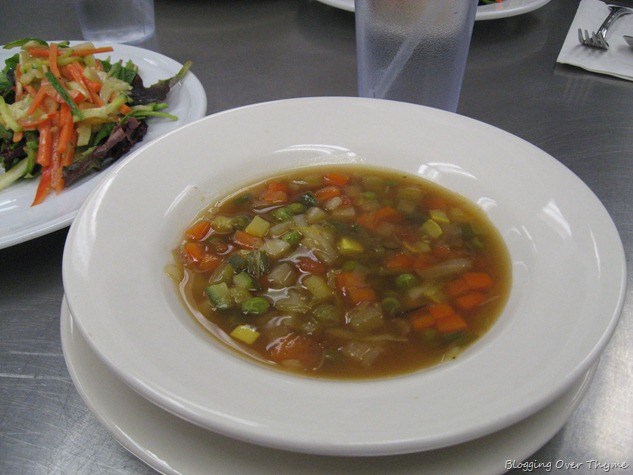
In addition to the potage and quiche, we also threw together a LA SALADE COMPOSEE (‘composed salad’) of fine julienned (defined are 1/8 inch by 1/8 inch x 2 inch) bell peppers, carrots, celery, and cucumber. We also used our chef’s knives to thinly shave a fennel bulb! I hope these veggie dishes continue to be a part of our daily menu for at least another few weeks.
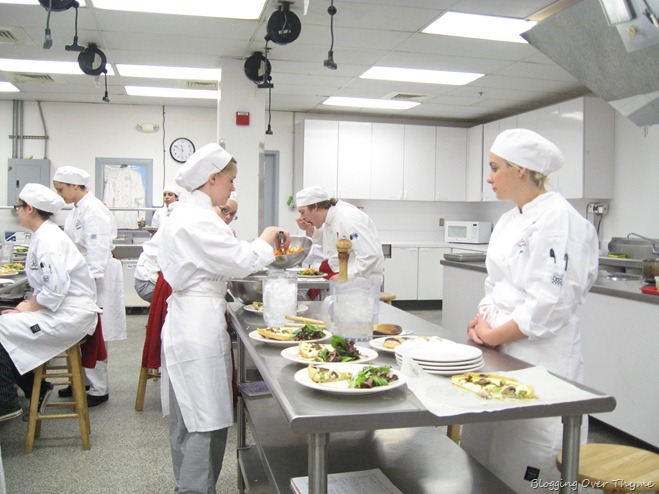
All of these dishes had to be ready and served, with utensils and water glasses all set, by 11:45, when the Phase I pastry students come to join us and eat our creations.
Friday’s quiche was even better than the one the day before. I love goat cheese, not to mention, asparagus and mushrooms are some of my favorite vegetables! The salad and veggies, with the light vegetable potage, were also really refreshing and colorful.
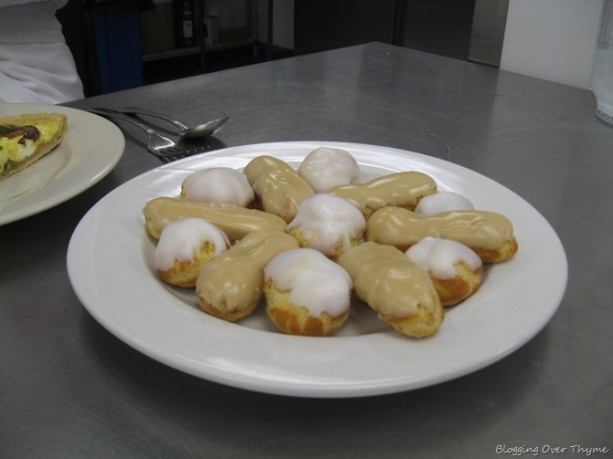
Per usual, the pastry students brought us their creations for the day, which included homemade coffee-flavored eclairs and profiteroles. I couldn’t resist and had a éclair, it was quite delicious. Notice how much smaller these ones are to the ginormous ones sold in most American bakeries?!
After lunch came cleaning time, which at least for me, was very labor intensive. I took on the task of cleaning the HUGE stockpot that had held chicken stock. It was the first time that we have cleaned it, as students and it is definitely an interesting task.
As I mentioned earlier, when each batch of homemade stock is used throughout the school, our group is tasked with cleaning the stockpot and starting the next batch. This involves removing all the cooked bones, mirepoix (onions, celery, and carrots), which after stewing for hours and hours looks like this…
Not exactly a pretty picture..
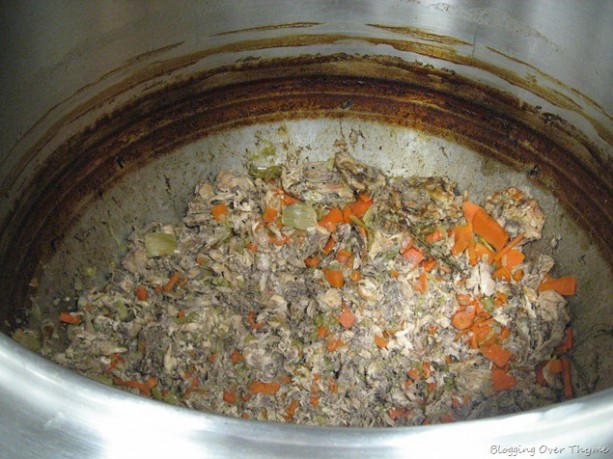
Cleaning this required stepping on a foot ladder and literally using a stock pot to scoop all the contents out (which weigh probably close to 50 pounds), putting them in a heavy-lined trashcan, and then scrubbing it down top to bottom!
We used a very large bristle brush and literally just scrubbing back and forth until it finally became shiny and clean again. As I joked with my chef instructor, the person who invented these stockpots should have developed a “self-clean” feature. Each of those dark rings around the edge, from stewing for hours, were scrubbed off in the end. It probably took me and Kevin, another classmate of mine, close to 45 minutes to finish this task! Maybe I burned off the éclair in the end?!
The rest of the afternoon was spent in the classroom beginning a discussion on weights and measures. We are responsible for knowing our measures (mostly volume, in our case) backwards and forwards so that, for example, if someone asks us how many teaspoons are in a gallon, we can answer back! Oh my…

We also learned how to hone our knives, which I was excited for. Honing, which is done with steels (as seen above), is for maintaining knives alignment and keeping it sharp (not sharpening, which is completely different thing). It can only maintain sharpness, not increase it. But unless you are doing it accurately, you could actually be doing more damage! Honing is something we are expected to do at least once, if not multiple times throughout a day. As a rule of thumb, our chef told us we should be able to slice through the skin of a tomato easily with our chefs knife every day.
Sharpening, on the other hand, is done with something called a wet-stone (different grits for different knife materials), which literally involves shaving down and whittling away at the metal and making it sharper. By honing, you can decrease the amount of times you have to resort to this, which is important, because you are literally decreasing the size of your knife each time you sharpen it.
Chef Brian also told us that you should probably never spend more than $100 dollars on a chef’s knife (especially starting out). Ultimately, the usefulness of your knife and how effective it is in daily use will come down to how you maintain it through honing. Therefore, having a $200-$300 dollar chef’s knife won’t get you anywhere in the long run if you don’t hone regularly.
I found all of this really interesting and definitely practiced several times this weekend! I’ll be back soon with more culinary school tales. Who knows what is in store for us this week!
P.S. Check out my culinary school page, which has a great video on my school’s culinary arts program! I’ll be updating this page with even more soon…
One Comment on “Day 3: Le Potage Cultivateur”
Awesome – I love your school posts! How in the wold do you have time to write this?!
Keep up the good work!