Homemade Agnolotti Pasta
Learn how to make homemade agnolotti pasta with step-by-step photos. Pick your own filling or use this recipe for ricotta, Swiss chard, and prosciutto filling!
We’re getting fancy today! I’m pretty sure I’ve mentioned my love of pasta about three million times on the blog thus far, so I’ll refrain from doing it again.
[But with that said, I really, really love it.]
This is definitely not an easy recipe. It takes a little bit of practice and finesse, but if you’re looking for a fun project over a long weekend, this is the perfect thing to make. Don’t be intimidated.
There’s something about kneading pasta dough dough (bread, pizza dough, etc.) that is very therapeutic. It is very mindless and repetitive, which is sometimes a welcome change compared to other recipes that require a lot of concentration.
I’ve been wanting to write a post on homemade agnolotti pasta for the longest time–but time has escaped me and I’ve only just come around to it. Forgive me.
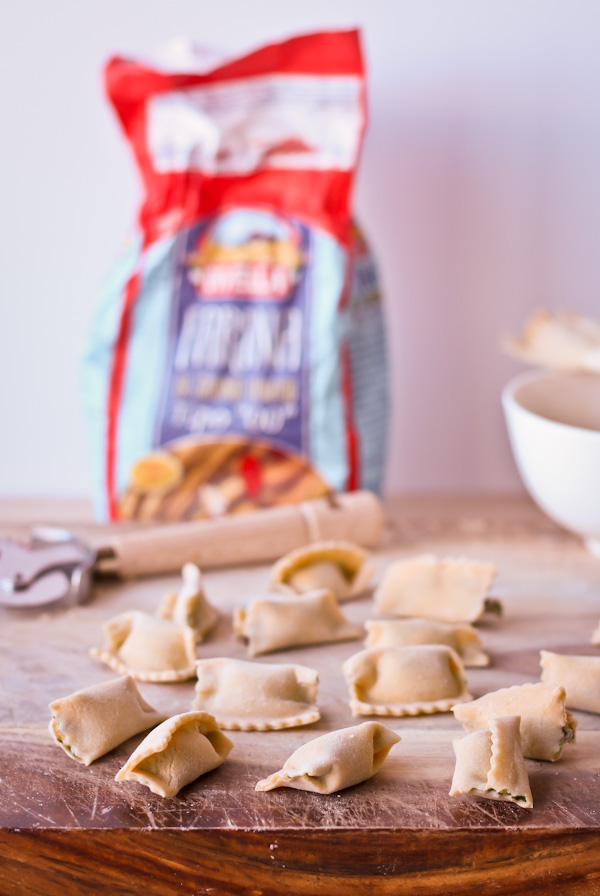
Agnolotti is a stuffed pasta, very similar to ravioli, but with a slightly different shape. In Italian, it translates to “priest’s hat”, a play off of the shape that it most resembles.
And if there is anything better than pasta, it is stuffed pasta. Am I right?
I first learned how to make these while I was working in the restaurant kitchen.
I spent some time on the pasta station (which essentially involved making any pasta dish that went out of the kitchen)– and even though it was terrifying at times– um, all of the time (SO.MUCH.PRESSURE)–I was very happy to work so closely with one of my favorite foods.
And one of my favorite, favorite things about stuffed pasta is that the fillings are endless. I happened to stuff these babies with a Swiss chard, ricotta, and prosciutto mixture (adapted lightly from Marcella Hazan)–and have included that delicious recipe below, but feel free to use another recipe or make your own creation!
Homemade Agnolotti Pasta
Equipment
- Pastry Cutter
Ingredients
Pasta Dough:
- 3½ cups (420 g) Type “00” flour or unbleached all-purpose flour
- 5 large eggs
Swiss Chard, Ricotta, and Prosciutto Filling:
- 1 lb Swiss chard stems removed and leaves roughly chopped
- 1½ tablespoons (22 g) unsalted butter
- ¼ cup finely chopped shallot about 1 medium shallot
- 3 tablespoons finely chopped prosciutto about 2 to 3 slices
- 1 large egg yolk
- 1 cup whole-fat ricotta cheese
- ¼ cup grated parmigiano-reggiano cheese
- ¼ teaspoon freshly grated nutmeg
- freshly ground black pepper
- kosher salt
Assembly:
- semolina flour for dusting
- 1 large egg, beaten for brushing
Instructions
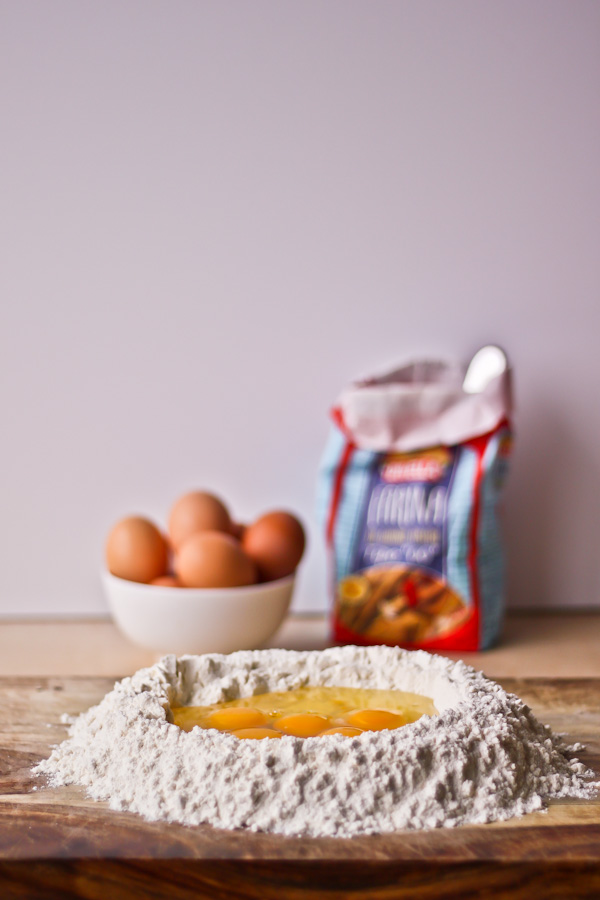
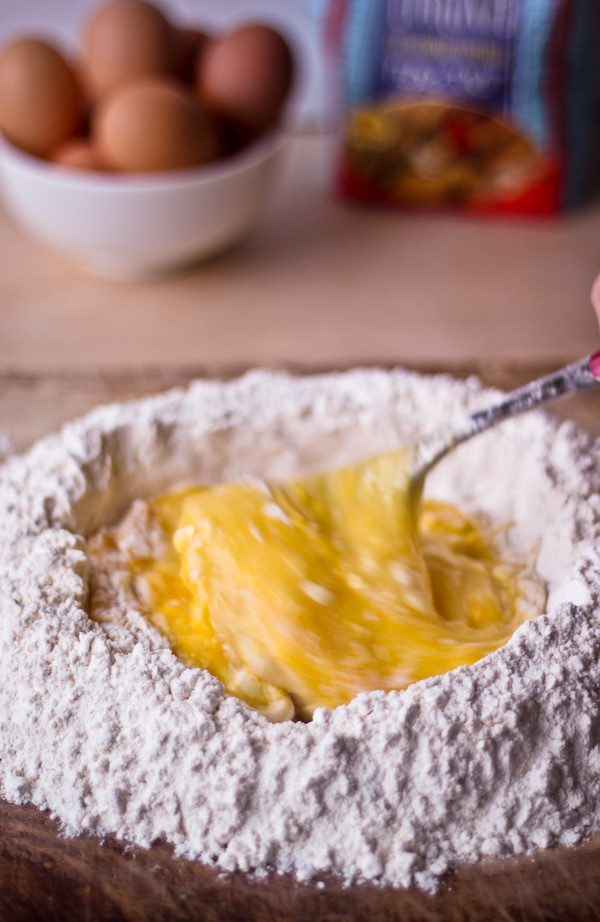
- Prepare Pasta Dough: Place the flour on a clean countertop or large cutting board. Using fingertips, create a large well in center of the flour, so that the countertop is visible. Crack the eggs into the well. Using a fork, slowly begin adding the flour from sides of the well into the egg mixture, whisking as you go, until the egg mixture is no longer runny.
- Using floured hands or a bench bench scraper, continue to incorporate the flour into egg mixture, until you can squeeze the dough with your hand without it sticking. Knead the pasta dough for 10 minutes or until it is very smooth and elastic.
- Divide the dough in half, flatten each piece into a disk using your palm, wrap the discs tightly in plastic wrap, and allow them to rest at room temperature for at least 30 to 45 minutes.
- Prepare Filling: Rinse the torn Swiss chard leaves in a colander until all grit has been removed. Do not dry. Bring a large pot of salted water to a boil. Add the Swiss chard leaves and blanch for 3 to 4 minutes or until tender. Drain well and allow the Swiss chard to cool until it can be handled comfortably. Place the swiss chard in a clean kitchen towel or thick paper towels, and wring out and discard any excess liquid. Chop finely. Set aside.
- In a medium saucepan, heat the butter over medium heat. Add the finely chopped shallots and saute until soft and translucent, about 3 to 4 minutes. Add the proscuitto and continue to cook for an additional 2 to 3 minutes, then add the chopped, blanched Swiss chard to the pan. Saute the green mixture for an additional 3 to 4 minutes, before removing from heat. Allow to cool until lukewarm.
- In a mixing bowl, combine the ricotta, egg yolk, lukeward Swiss chard mixture, nutmeg, and cheese until mixed. Season mixture to taste with salt and pepper. Transfer mixture to a large piping bag fitted with a small round tip.
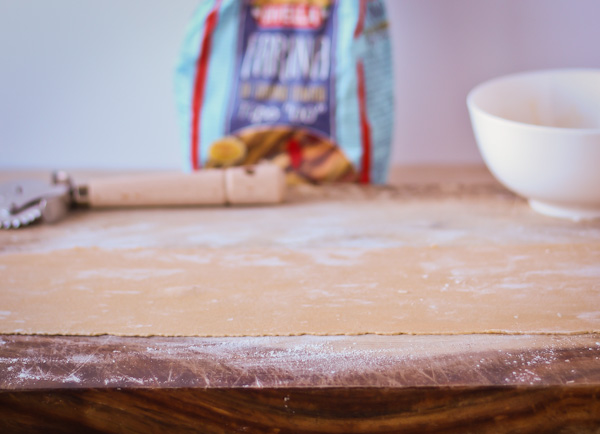
- Assemble Agnolotti: Once the pasta dough has rested, knead briefly, adding more flour if necessary. Flour will absorb during resting, so sometimes it is necessary to add additional flour to ensure the pasta dough isn't over sticky. Divide each dough ball in half again and using an electric or manual pasta machine, roll the dough disc using the largest-width setting.
- Fold into an envelope by bringing one edge into center, repeating with other side. Continue to roll at the largest-width setting, placing the dough into the machine so the seams face the machine, and repeat at least five times until dough is very smooth and rolls evenly.
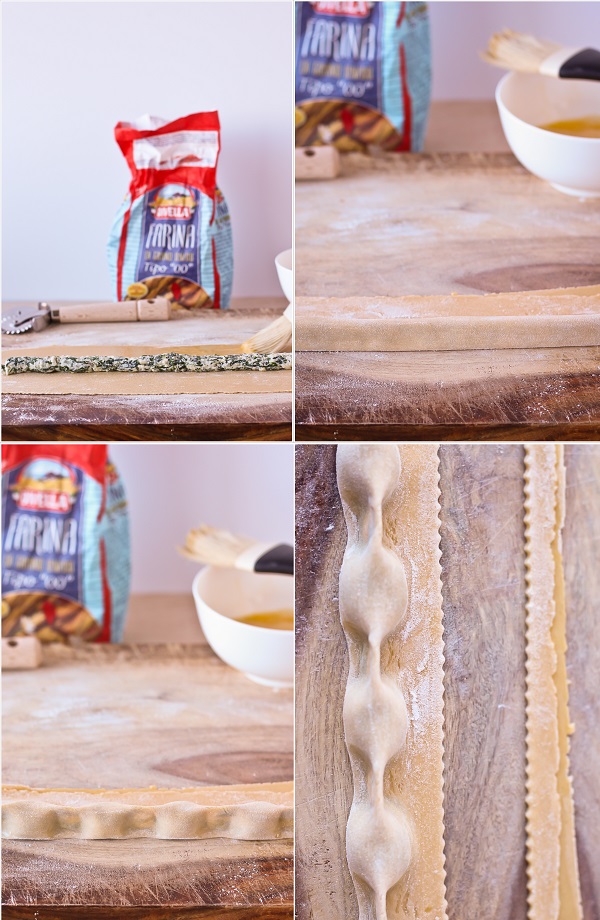
- Roll the pasta dough to setting “5” on your pasta machine, or until very thin and almost translucent. Cut into 12-inch long sheets. Allow the rolled dough to dry slightly at room temperature, hanging on a rack, or until no longer tacky. Since you will need to assemble the agnolotti, avoid rolling too much pasta dough discs at once, as it may get too dry otherwise.
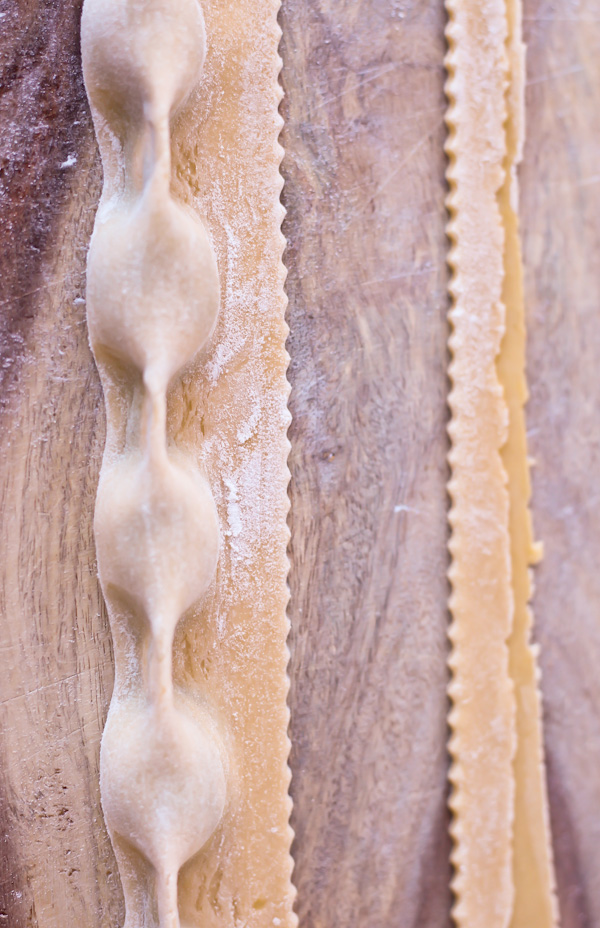
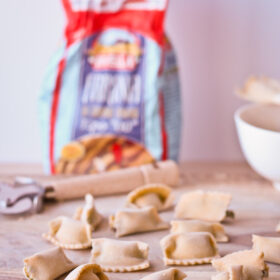
- Take one sheet at a time and place on a lightly dusted countertop. Pipe the ricotta filling in a thin straight line (½-inch in diameter) horizontally in the center of the sheet of pasta. Brush the dough adjacent to the filling, on both sides, lightly with egg wash. Fold one side of the dough over the filling, gently pressing the dough to remove any air bubbles around the filling, pressing firmly to seal. Using a fluted wheel pasty cutter, cut the filled pasta away - leaving a ½ to ¾-inch edge - from the rest of the sheet. Discard the trimmings (or cook or use in other ways).

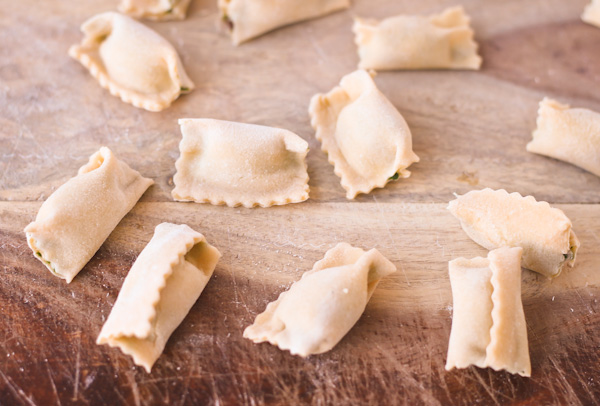
- Using your fingertips, indent the dough into equal-sized sections (roughly 1-inch inch wide), creating a firm seal between each piece. Using your hands, gently roll the dough over to the edge and and using a pastry cutter, quickly cut between each seal to form an agnolotti. Do this step quickly, as it will help create a firm seal. Place the assembled agnolotti on a large baking sheet dusted with semolina flour.
- Repeat with remaining pasta sheets, until all agnolotti have been assembled. Pasta can be stored in the fridge overnight, cooked immediately, or frozen on the sheet tray until solid (before being transferred to a ziploc bag).
- To cook, boil the agnolotti in boiling salted water until al-dente.
43 Comments on “Homemade Agnolotti Pasta”
Great step-by-step directions. I must try this soon.
So excited to give this a try! How much olive oil should get mixed in with the eggs in step 2 of making the dough?
Hi Maria! This is a very very old recipe on my site and honestly, the written recipe needs to be improved upon because it is outdated and not up to my current standards (my site is over 10 years old). I just noticed this confusion, and I’m sorry about that! You don’t have to add any olive oil to the dough. Just flour and eggs work. Hope this helps!
I been looking into making my own pasta recently but was a little intimidated at first. I am definitely going to at least try this though. Great photos!
I love making homemade pasta! It was definitely intimidating at first, but it is SO rewarding! Love the prosciutto included in the filling, I bet it gives it a perfect salty kick.
Wow these are absolutely stunning! You may have given me the courage to give this a try!