Classic French Boule
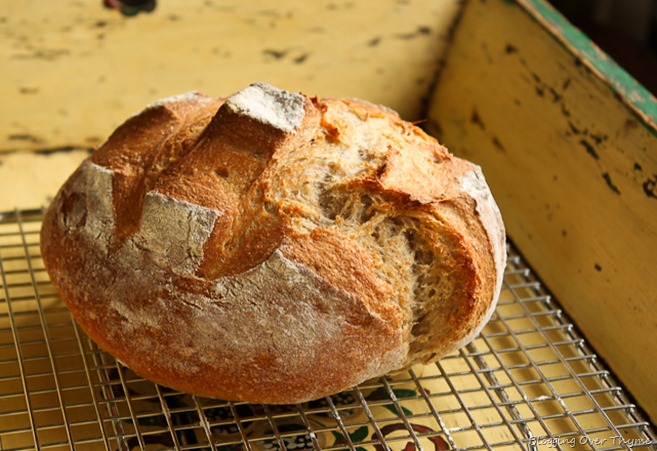
This classic French boule is incredibly easy to make and produces a delicious, crusty artisan style loaf of bread without any of the fuss.

Over the past year, yeast, an ingredient that once intimidated me, has quickly become one of my favorite ingredients to use in the kitchen.
I’ve experimented with multigrain loaves, no knead focaccia, and dinner rolls, but this French Boule is one of my all-time favorite easy bread recipes.
The dough is incredibly easy to make and the resulting artisan-style bread has a lovely hearty crusty and crumb. This bread pairs wonderfully with homemade soup. It can also be used for sandwiches or sliced and served plain with salted butter. In my opinion, great bread doesn’t need a lot of frills or toppings.
If you love this bread and are looking to take your bread baking skills up a notch, I highly recommend trying your hand at homemade sourdough next.
This French Boule dough, which yields two 2-pound loaves, can be stored in the refrigerator for up to two weeks, allowing you to make homemade bread any day of the week. I promise, after tasting this bread, you’ll be making it all the time.
The recipe is adapted slightly from one of my favorite cookbooks, Artisan Bread in 5 Minutes A Day, by Jeff Hertzberg and Zoë Francois.
The original recipe calls for 100% unbleached white flour. This version contains a mixture of whole wheat flour and the end result is even more delicious, while still retaining a crusty exterior and not being overly dense. Happy bread baking!

Classic French Boule
Ingredients
- 3 cups (680g) warm water (95°F/35°C)
- 1 tablespoon + 1½ teaspoons active dry yeast
- 1 tablespoon + 1½ teaspoons (18g) kosher salt
- 4 cups (560g) unbleached all-purpose flour
- 2½ cups (350g) whole wheat flour
- semolina or cornmeal for dusting
Instructions
- The Day Before Baking: In a large container(with non-airtight lid), whisk together warm water, yeast, and salt. Slowly add in all-purpose and whole wheat flour, mixing with wooden spoon. When dough becomes too difficult and thick to stir, start mixing with your hands until all the flour is incorporated and the dough is uniform in texture. It should be very wet and sticky, do not knead the dough. Cover the dough lightly (do not seal container) and allow to rise at room temperature for at least 2 hours. Transfer dough container to the refrigerator. Dough can be used the following day or stored for up to 2 weeks.
- Important Baking Note: Steam enables the bread to develop a crusty, crisp exterior. One way to incorporate steam into your oven at home is to place a broiler tray on an oven rack and fill it with very hot water immediately after placing the loaf in the oven. Close the oven door immediately. If you do not own a baking stone or steel, you can also bake this loaf in a Dutch oven using the method outlined in my artisan sourdough bread recipe. It will yield even better results.
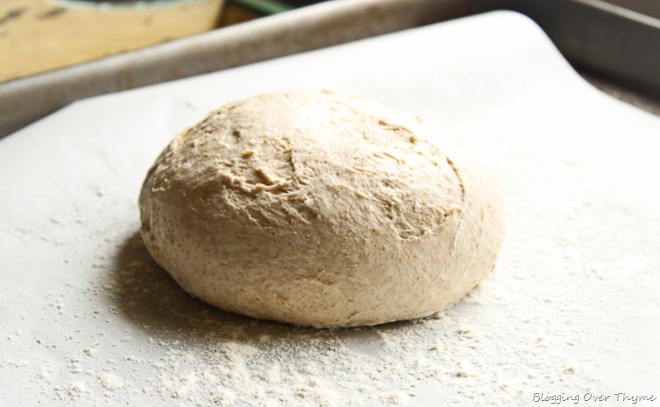
- Before Baking: Preheat a pizza stone or steel to 450°F (230°C) for at least 45 minutes. Dust a pizza peel lightly with semolina or cornmeal, remove half of the dough from the refrigerator and quickly “cloak” and shape the dough into a tight round. This shaping process should only take about 30 to 60 seconds total. To do so, stretch the surface around to the bottom of the loaf, creating surface tension on the top of the loaf so that the surface is relatively smooth. Allow the shaped boule to rest uncovered at room temperature for 45 minutes. Equipment Note: If you do own have a pizza peel, place dough on a half sheet pan lined with parchment paper.

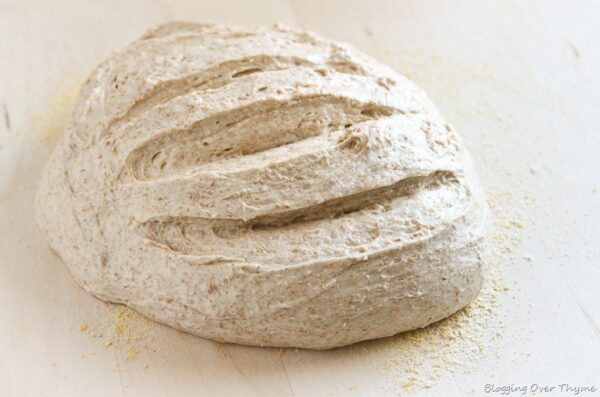
- Once the oven has preheated, lightly dust the top of the loaf with all purpose flour and using a serrated knife, score the top of the loaf with a scallop pattern (see photo) or # pattern. The individual scores should be no more than ½-inch deep.

- Transfer the dough onto the pizza stone (or place the baking sheet in the bottom third of your oven) and bake for 35 to 50 minutes, or until the internal temperature reads between 190°F-200°F (88°C-93°C). Allow loaf to cool on a rack for 1-2 hours before slicing. You can slice into the bread earlier, but allowing it to cool completely yields a better crumb texture and helps prevent the bread from losing moisture and staling faster.

77 Comments on “Classic French Boule”
Hi there!
I saw how it was as I was making it so just adjusted it to a more likely dough hydration percentage by adding more flour. Just thought I’d point it out 🙂
Thanks for the reply 🙂
N
Appreciate you pointing it out to me and being understanding!
Hi. Are you sure about the metric measurements for the flour as that dough is nearly 100% hydration. It’s like porridge…
Hi Nico – sorry, there was a big error in the gram conversions (that were added later – I use a different conversion for cups than the original recipe that this was adapted from). This recipe/post is over 12 years old and is not one that many people stumble upon my site and therefore hasn’t been updated since it was originally published. I have just updated the gram measurements and will plan on updating this soon per my current standards. If you made the dough and need help, you could bake it like focaccia, that’s probably the best option at this point.
I love this recipe! I have tried it several times. The first couple times, it seemed a touch on the salty side, so I reduced the salt to 1 Tbsp. It was perfect. I bake it at 450° for about 45 mins until internal temp is 190°… Pan of water in the bottom of the oven on an open cast iron skillet. I’ve baked it with no cover (top was too brown) then lightly covered with foil ( it was perfect). Thank you for sharing this great recipe! The 2 loaves last our family of 3 about a week (we eat lots of bread).
I need to update this recipe to include metric weights, but every brand of salt varies significantly in density, so that could be the culprit. Use Diamond Crystal brand when in doubt!
Can I substitute beer for part of the water?
Hi Keith,
I personally haven’t done this before and this isn’t a traditional beer bread by any means, but I don’t see why not…I just can’t personally advise how it will impact the dough. Sorry!
Laura,
can I bake this bread in a cast iron dutch oven like sourdough?
Yes! That would work well! I haven’t personally done it, so can’t quite give exact tips (this recipe is one of the older ones on my site and I haven’t made it a while), but a lot of doughs can benefit from that type of baking method. If you’re looking for a sourdough recipe, this is my go-to and a popular one on my site: https://www.abeautifulplate.com/artisan-sourdough-bread-recipe/
Do you think I could let this rise for 45 min. in an unlined proofing basket (I love the spiral lines it creates on the crust) and then invert into a pre-heated pizza stone?
Hi Lisa,
I haven’t tried that with this recipe (I’ve done this with sourdough), so unfortunately I can’t say for sure, but I don’t see why not. Hope this helps!
Hi Lisa,
I proof mine in a basket, then turn it out onto parchment paper, and place it on the hot stone. Comes out beautifully!
Snap! I forgot to say that I used a rimmed baking pan with water in it at the base of the oven to create a steam bath which made the crust divine.
Fantastic Recipe!
EASY AND FUN! Followed it step by step- EXCEPT!! – on step 4. I didn’t dust it with floor…. as instructed. I used flour instead. Thanks for my FIRST EVER BAKED BREAD!! YAY! Thank you a million times <3
xoxo