How to Make Cultured Butter
Learn how to make cultured butter (and real buttermilk) at home with this easy recipe and how-to guide.

Look at that glorious butter slab! If you’ve stuck around here for any length of time, you know that I’m not one to shy away from butter.
Several years ago, I wrote a lengthy (there is no other word for it!) guide on how to make clarified butter, ghee, and brown butter at home. It seems only right to take it one step further.
Today I’m sharing how to make cultured butter! I absolutely love to share these types of recipes as the process is often so much easier and more enjoyable than people might realize.
If you’ve never tried or heard of cultured butter, you’re in for a treat! Both literally and figuratively.
I started making homemade cultured butter when I started my sourdough bread baking journey a year ago. After sharing some behind-the-scenes videos of the process on Instagram, I got so many requests to share a step-by-step guide and recipe. Let’s do this!
What is Cultured Butter?
Cultured butter is made from cultured cream. In other words, cream that contains live bacterial cultures and has fermented for a period of time.
Similar to yogurt, cultured butter has a slightly tangy flavor that sets it apart from regular butter.
It has a unique flavor that enhances just about everything. Keep it simple and slather cultured butter on sourdough bread (my personal favorite!) or use it in lieu of regular butter in your favorite baked goods or savory dishes.
While store-bought cultured butter is much easier to find these days, it is extremely easy and fun to make cultured butter at home! It’s significantly cheaper too.
To make cultured butter, you’ll need just two basic ingredients.
Ingredients You’ll Need:
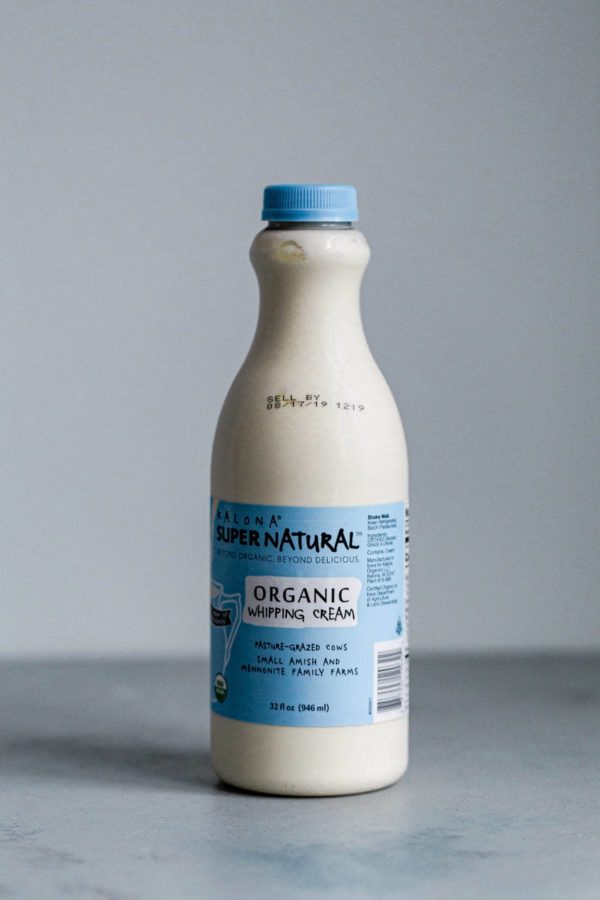
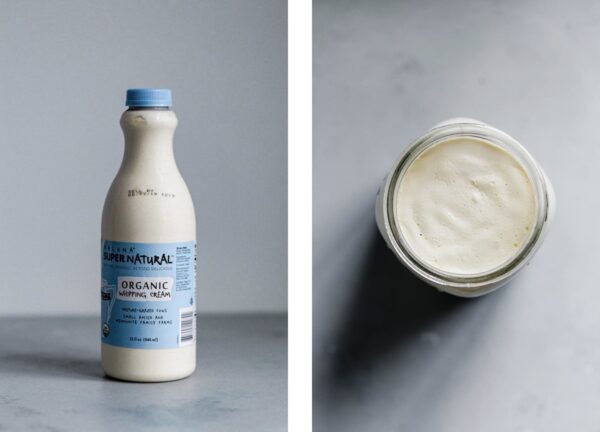
- High-Quality Heavy Cream (*not ultra-pasteurized) – you can’t make butter without heavy cream! You’ll need heavy cream that is not ultra-pasteurized for this recipe. Ultra pasteurized cream and whipping creams often contain thickeners and gums, and can encounter issues during culturing. Since we’re going to the trouble of making butter from scratch, I highly recommend seeking out the best quality cream that you can get your hands. 100% grass-fed will yield the best flavor, color, and nutritional profile.
- Cultured Buttermilk – or Plain Unsweetened Yogurt with Cultures, Cultured Sour Cream, or Cultured Creme Fraiche – while traditional butter is made from cream, homemade cultured butter is made from cream that has added live bacterial cultures. Traditional cultured butter is made from heavy cream to which we have added cultured buttermilk (or cultured sour cream or creme fraiche). Plain unsweetened yogurt with live cultures works just as well. Use whatever you already have on hand or already buy regularly! Future batches of cultured butter can be made from any leftover homemade buttermilk.
Equipment:
- tight-lidded container, fine-meshed sieve, mixing bowl, spatula, and stand mixer with whisk attachment (you can also use a food processor or even shake the cream by hand)
How to Make Cultured Butter
Culture the Cream:
Combine the cream and culturing agent (cultured buttermilk, plain unsweetened yogurt with live cultures, or cultured sour cream or creme fraiche) in a lidded container.
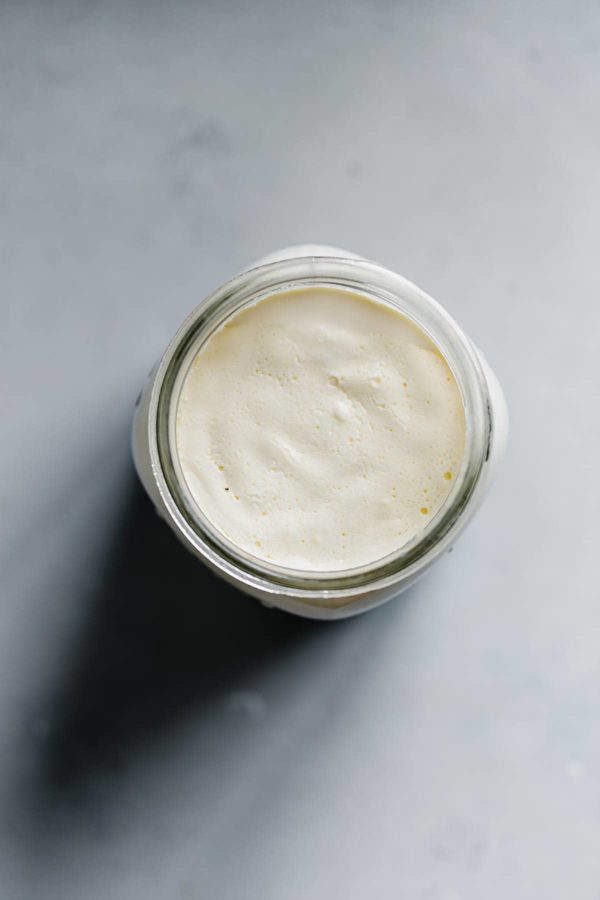
Allow mixture to sit at room temperature – roughly 70 degrees to 75 degrees Fahrenheit – for at least 24 hours and up to 48+ hours. The mixture will thicken and have a stronger, more pronounced tangy flavor as it ferments. It will sour and become significantly thicker in texture.
Transfer the cream mixture to the refrigerator to chill for at least one hour. This will ensure that the butterfat will stay firm and not become greasy during churning.

Churn in a Stand Mixer:
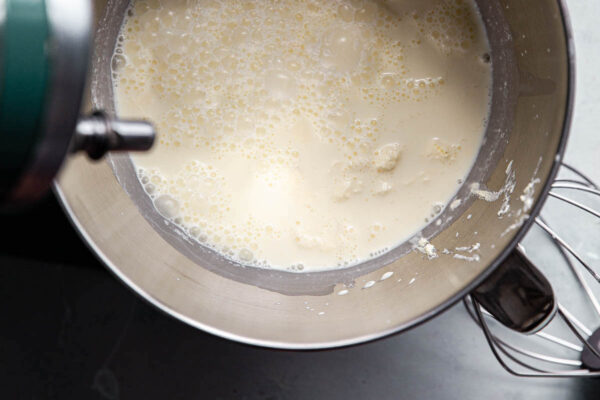
Place the chilled cream mixture in the bowl of stand mixer fitted with a whisk attachment.
Cover the stand mixer with a clean kitchen towel (this will help absorb any splattering) and whip over medium-high speed until the mixture has thickened and has the texture of a soft whipped cream.
Note: If you don’t own a stand mixer, you can use a large food processor or use your arm muscles and shake the cream in a large jar!

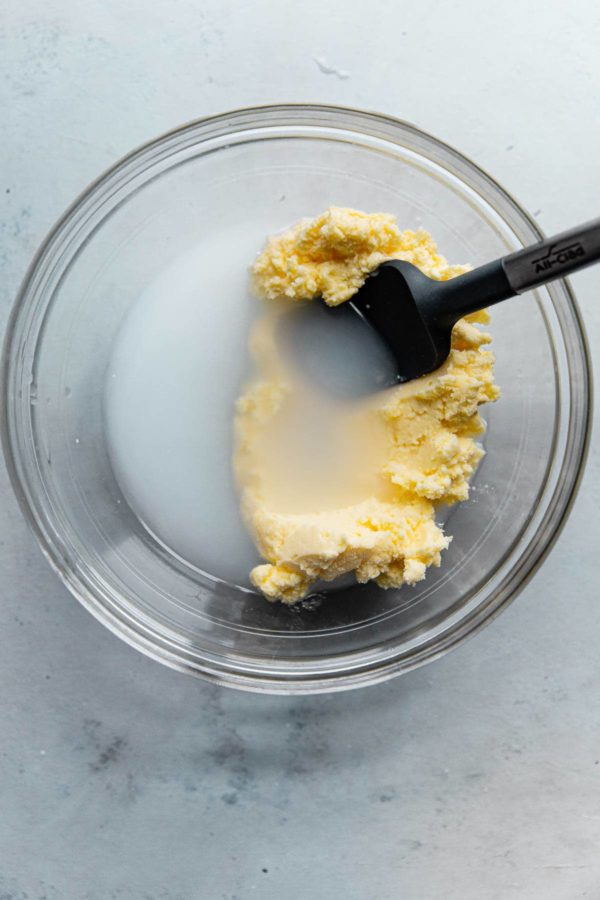
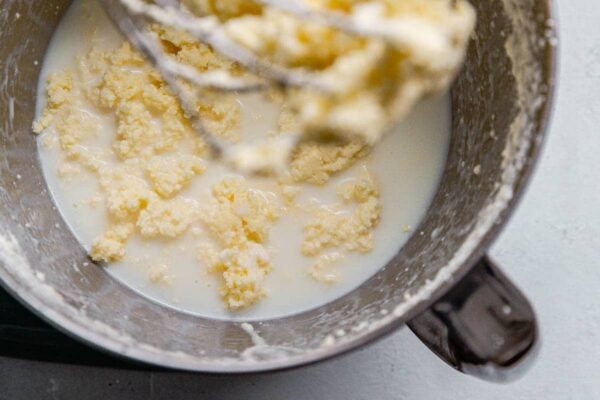
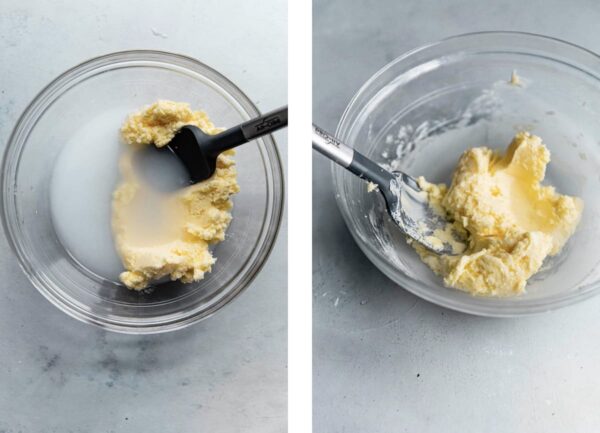
Reduce the mixer speed to medium-low and continue whipping until the liquid and butter fat just begin to separate and it looks curdled.
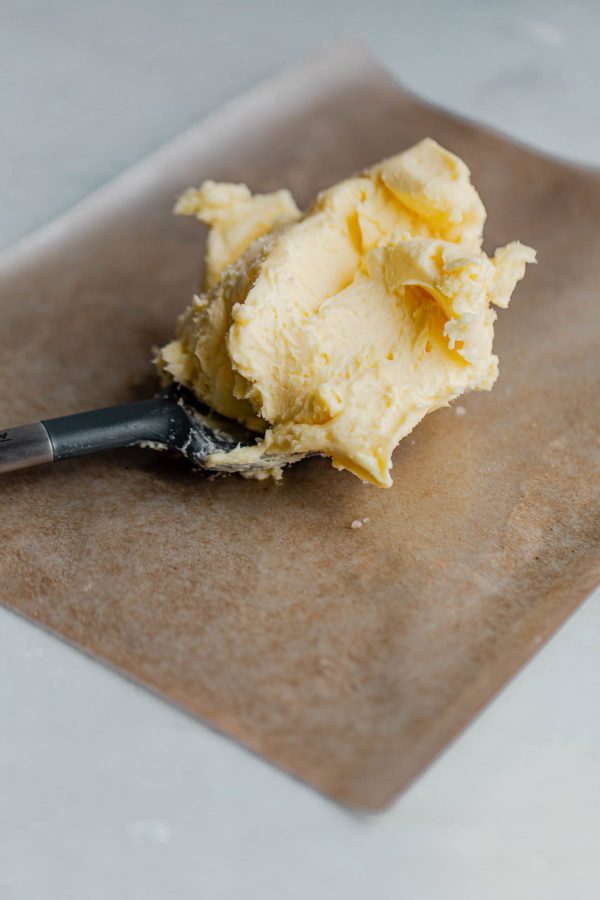
Reduce speed to low – be sure to cover the mixer as it can splatter considerably at this stage – and continue whipping until the butter comes together as a solid mass on the whisk attachment.

Strain the Buttermilk:
Set a large fine-meshed sieve over a large mixing bowl. You can line the sieve with muslin, but I do not find this step necessary. Gently pour over the liquid (this is real buttermilk!) then transfer the mass of butter to the sieve. Using a spatula, gently press the butter against the sieve to release any additional liquid – without pushing the butter through the sieve.
Transfer the buttermilk to a covered container and refrigerate. Homemade buttermilk can be stored in the fridge for one to two weeks.


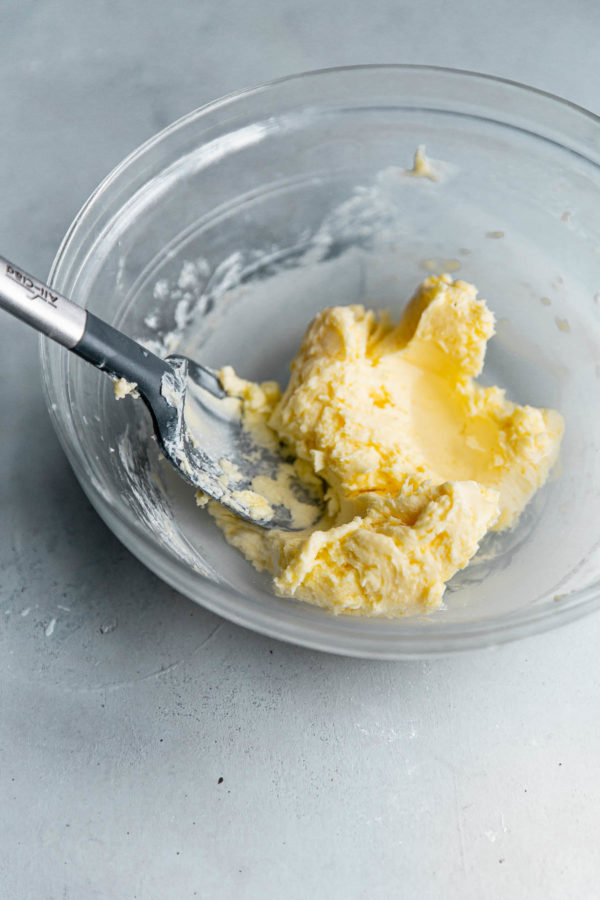
Wash the Butter:
Meanwhile, transfer the mass of butter to the empty mixing bowl. At this step, we will wash the butter repeatedly with very cold water, pressing the butter to release any excess buttermilk. Strain, wash, repeat.
The cold water helps to firm up the butter and washing helps remove any excess buttermilk from the butter. This will prevent it from spoiling and extend its storage life.
Once the water runs clear and you have drained the liquid, press the butter once more to release any excess water. If you desire, you can use clean hands to do this but this isn’t required.
Add Salt If Desired:
At this stage, you can choose to mix and stir in salt or other seasonings, if desired. I prefer not to salt my cultured butter (and sprinkle salt after using, etc.) as it can mask the delicious tangy flavor.

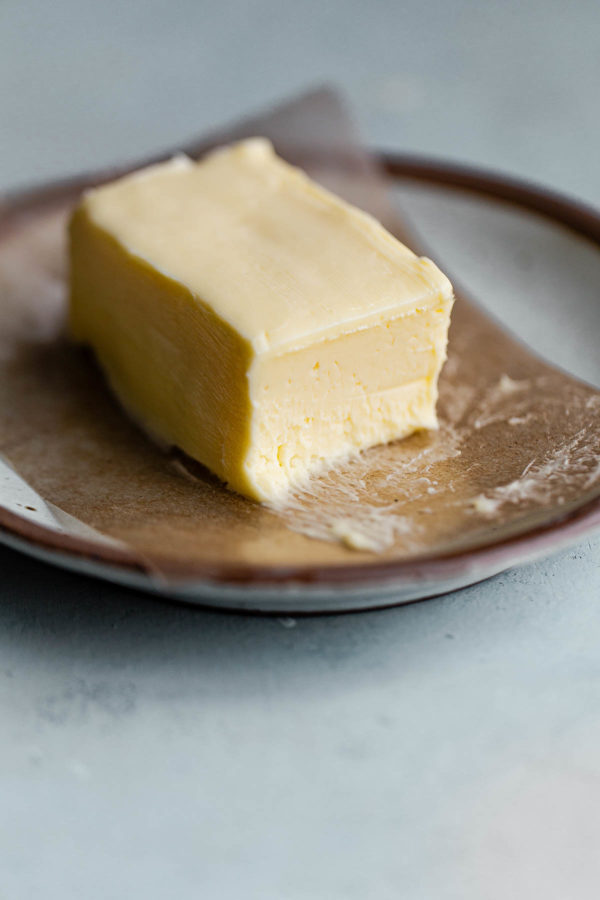
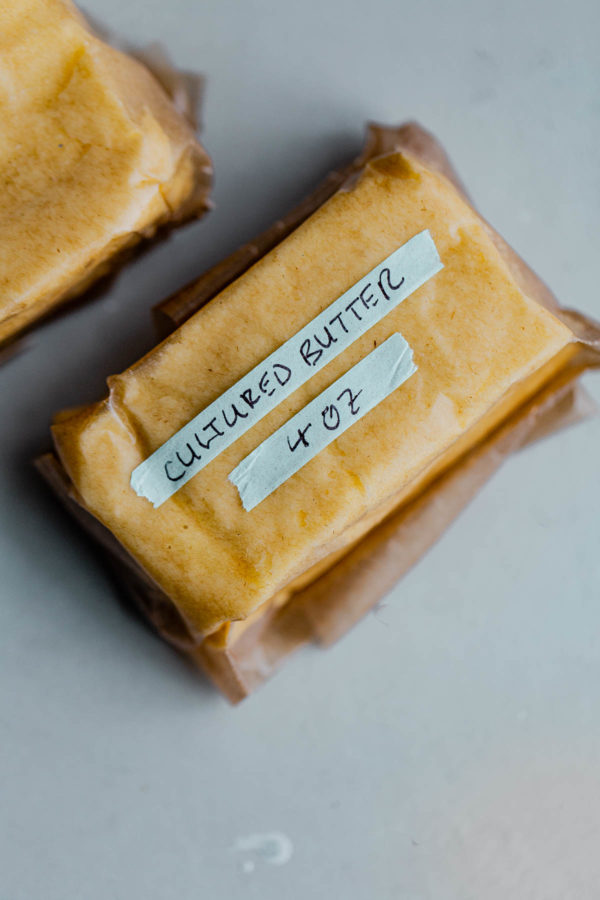
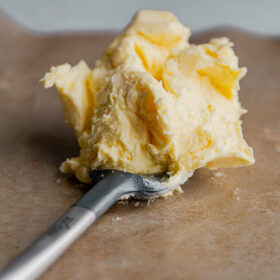
Wrap and Store the Cultured Butter:
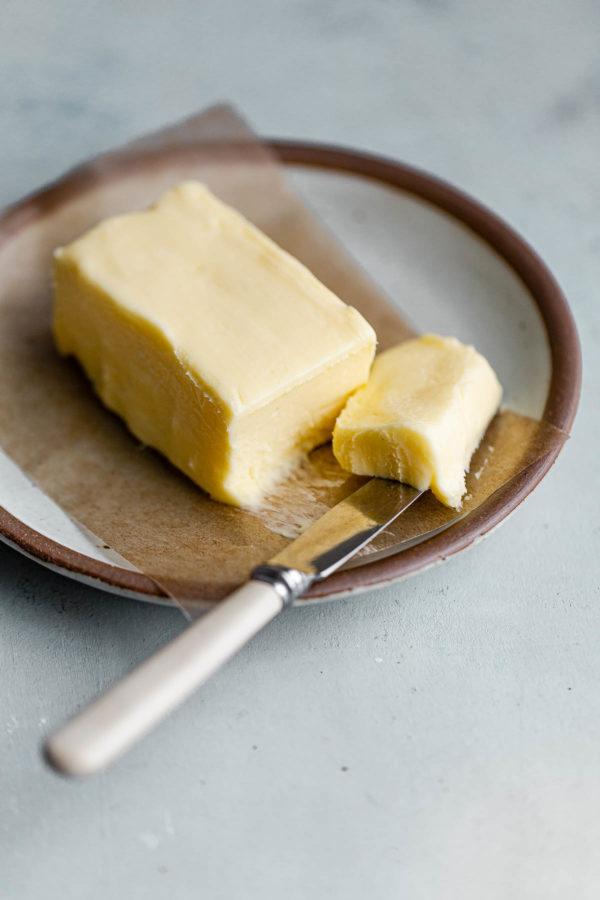
Divide the butter in half – this recipe makes roughly 12 ounces of cultured butter – shape as desired, wrapping the butter in wax paper. Store well-wrapped in the refrigerator for up to a month (or longer) or freeze for later use.
Ways to Use Cultured Butter:
- slather on homemade sourdough bread, waffles, pancakes, or my easy whole wheat biscuits
- fold into my favorite Yukon gold mashed potatoes
- make homemade cultured compound butter infused with your favorite seasonings or herbs
- use in lieu of traditional butter in your favorite baked goods
- enhance and add a touch of tang to savory dishes or sauces

An extra bonus of making cultured butter from scratch is that you’ll make real buttermilk in the process! The flavor is unparalleled. Use it in buttermilk pancakes, waffles, or other dishes. Here are handful of my favorite recipes that use buttermilk.
Ways to Use Leftover Buttermilk:
- Easy Blueberry Muffins
- Whole Wheat Apple Cinnamon Muffins
- Easy Whole Wheat Biscuits
- Irish Soda Bread Scones
Homemade Cultured Butter
Ingredients
- 1 quart (4 cups; 960 mL) high quality heavy cream not ultra pasteurized; no stabilizers added
- 3 tablespoons (45 mL) cultured buttermilk or plain unsweetened yogurt with live cultures, or even cultured sour cream or creme fraiche
- ¼ teaspoon kosher salt optional
Instructions
- Culture the Cream: Combine the cream and culturing agent (cultured buttermilk, plain unsweetened yogurt with live cultures, or cultured sour cream or creme fraiche) in a lidded container. Stir to combine.
- Allow the cream mixture to sit at room temperature, between 70°F to 75°F (21°C-24°C), for at least 24 hours and up to 48+ hours. The mixture will thicken and have a stronger, more pronounced tangy flavor as it sits. It will sour and become significantly thicker in texture with time.

- Transfer the cream mixture to the refrigerator and chill for at least one hour. This will ensure that the butter fat will stay firm and not become greasy during churning.
- Churn: Place the chilled cream mixture in the bowl of stand mixer fitted with a whisk attachment (note: you can also use a large food processor or even shake the cream by hand if you're up to it!). Cover the stand mixer with a clean kitchen towel (this will help prevent any splattering) and whip over medium-high speed until the mixture has thickened and has the texture of a soft whipped cream.

- Reduce the mixer speed to medium-low and continue whipping until the liquid and butter fat just begin to separate and it looks curdled. Reduce speed to low - be sure to cover the mixer as it can splatter considerably at this stage - and continue whipping until the butter comes together as a solid mass on the whisk attachment.
- Strain: Set a large fine-meshed sieve over a large mixing bowl. You can line the sieve with muslin, but I do not find this step necessary. Gently pour over the liquid (this is real buttermilk) then transfer the mass of butter to the sieve. Using a spatula, gently press the butter against the sieve to release any additional liquid - without pushing the butter through the sieve. Transfer the homemade buttermilk to a covered container and refrigerate. The buttermilk can be stored in the fridge for one to two weeks.
- Wash: Meanwhile, transfer the mass of butter to the now empty mixing bowl. At this step, we will wash the butter repeatedly with very cold water, pressing the butter to release any excess buttermilk. Strain, wash, repeat. The cold water helps to firm up the butter and washing helps press out any excess buttermilk from the butter, which will extend it's storage life in the fridge.

- Pour 1 cup (240 mL) of very cold water over the butter and using the back of a spatula (or spoon), press the butter repeatedly against the edge of the bowl. Drain, discarding any liquid, and repeat until the water runs clear. This will take anywhere from 4 to 6 washes. Be sure to err on the side of overwashing. Once the water runs clear and you have drained the liquid, press the butter once more to release any excess water. If you desire, you can use clean hands to do this - but it isn't necessary or required.
- Add Salt If Desired: At this stage, you can choose to mix and stir in salt or other seasonings, if desired. I prefer not to salt my cultured butter (and sprinkle salt after using, etc.) as it can mask the tangy flavor.
- Store: Divide the butter in half - this recipe yields roughly 12 ounces of cultured butter - shape as desired, wrapping the butter in wax paper. Store well-wrapped in the refrigerator for up to a month (or longer) or freeze for later use.
Storage Tips:
- Cultured butter can be wrapped well and stored in the refrigetator for up to a month (or longer) and can also be frozen and thawed for later use.
100 Comments on “How to Make Cultured Butter”
What size is each serving , a table spoon or an ounce? thank you
So good! The butter is slightly sour on its own, but on toast, you can’t taste the sourness, and it is much lighter than normal butter! However I don’t love keeping out of the fridge, the texture is much softer than normal butter when kept out of the fridge.
I haven’t tried it yet, once I mix the cream and yogurt, does it need to be in a closed container or open for the 24 to 48 hrs?
This is listed in the instructions, you want a lidded container. It doesn’t need to be airtight though.
WOW!!! Here is my story. I bought 2 quarts of whipping cream in November with the intention of making chocolate and vanilla ice cream for Christmas. However, I came down with Covid19 on 17th December and just as I was beginning to feel better in early January, I slipped on the ice and broke my left leg. After more than two months I am able to walk carefully in the house and I am getting back into doing fun things. I found your recipe for cultured butter and decided to give it a try. May I say again, WOW! I followed your instructions and left the whipping cream mixed with yogurt in a large Vlasic pickle jar on the counter for about 45 hours. I just finished whipping up a bit more than 1.5 pounds of butter and got 1 quart of buttermilk as well! I am eating fresh from the oven Cornish split sweet buns with fresh butter and raspberry jam and sipping a cup of English breakfast tea. Thank you so much for posting your recipe for the cultured butter. You have changed my world!!
Love this recipe works well easy to follow x
Love your easy, clear instructions (less complicated than some I’ve read). Another healthy ferment for the gut microbiome 😃. Will be starting my fist attempt today 😋
I found this recipe through sourhouse (in their free ebook) and it suggests that I can use my starter instead of yoghurt? Is that correct?Has anyone tried this ? I’m super keen but am curious about what the texture my be like 🤔
I was involved in allowing them to republish the recipe, but I do not remember that detail as I definitely have never done this myself and if they did add this note, I was not involved in that decision. I have no experience with doing this, but I wouldn’t necessarily advise it? If you do want to try this out, I would recommend following another recipe.
Yes i made with plain greek yog today works wonderfully x
This butter turned out beautifully. Creamy, tangy, and it whipped up in no time at all. Brilliant recipe!
If I don’t have buttermilk handy can I use the lemon/milk hack to make my own buttermilk for my first batch?
No, that will not be sufficient here – you need the active cultures in order to make cultured butter.
Hi, can you tell me what size is the serving , a tablespoon or an ounce?
I intend to make this , no matter what – just need to know how to balance it with other fats.
Typical serving size for butter is 1 tablespoon roughly. It will be very similar to the nutritional profile of standard grocery store butter.
I successfully made my first batch of cultured butter using this tutorial! I had to use ultra pasteurized cream because that was all I could find, my hand mixer was broken (only 1 beater, I know, I’m a mess) but I still got a lovely bit of butter and it lasted maybe 2 weeks in my house (and there’s only 2 of us). The leftover buttermilk was used for sourdough waffles.
I’m now trying a second time with an upgraded mixer and a better-quality cream to see if I can get a tangier butter that’s closer to the cultured butter I’ve tried in the store but can’t find anymore. Great recipe, thank you!
I made this! Used pasteurized cream and yogurt with live cultures. I let it sit at room temp for 48, then fridge for 12hrs. Used my food processor to mix into butter. Came out perfect! Taste like butter with a hint of cream cheese! Thank you for the recipe.
Can you use the Buttermilk in salad dressings?
Definitely! You can use it the same way you’d use any store bought carton, just remember that the dressing should be obviously stored in the fridge as you would normally.
Followed recipe and it came out as it should. Comment of letting it whip longer was helpful. 3 stars because it didn’t taste any better than store bought. I let it sit for 48 hours and it certainly smelled tangy. I used high fat, high quality pasteurized whipping cream from the health food store. More work than I would do again for no increase in flavor. Comment of letting it whip longer, possibly 45 minutes was helpful.
This is a tutorial for how to make it at home, the flavor will all depend on the cream that you use – if you don’t notice a flavor difference that is worth the labor, than that’s valid, but I don’t see why you’d rate the recipe based on the that. You should rate the tutorial based on the quality of the instructions and whether it turned out accordingly.
Thank you so much for posting this! I am going to use your recipe this weekend and I can hardly wait. Do you think it would make any difference to chill the mixing bowl? I keep my mixing bowl in the freezer for when I make pie crust.
It might speed up the process a bit, but it shouldn’t matter much for this.
Just general query, can you use kefir as the culture agent
Yes, you could do this. Again as long as there are active cultures.
I just made a batch using 1l 31% heavy cream and just under 1/4 cup buttermilk, and letting it do it’s thing for 36 hours.
It is incredible!
This isn’t the first time I’ve made butter, but this is a hell of a lot easier than churning or shaking by hand!
Thanks!